

This quick start uses Dify Cloud, the fastest way to get going: free to start, AI credits included, and nothing to install. Prefer to run Dify yourself? Self-host Dify, then follow the same steps on your own instance.

Before You Start
Sign Up
Go to cloud.dify.ai and sign up for free.New accounts start on the Sandbox plan, which includes 200 AI Credits for calling models from providers like OpenAI, Anthropic, and Gemini.
The 200 AI Credits in the Sandbox plan are a one-time allocation and don’t renew monthly.
Set Up the Model Provider
Go to Settings > Model Provider and install the OpenAI plugin. This tutorial uses
gpt-5.2 for the examples.No API key is required while you’re using Sandbox AI Credits. The plugin is ready to use once installed. You can also configure your own API key and use it instead.Step 1: Create a New Workflow
- Go to Studio, then select Create from blank > Workflow.
-
Name the workflow
Multi-platform content generatorand click Create. You’ll automatically land on the workflow canvas to start building. - Select the User Input node to start our workflow.
Step 2: Orchestrate & Configure
Keep any unmentioned settings at their default values.
1. Collect User Inputs: User Input Node
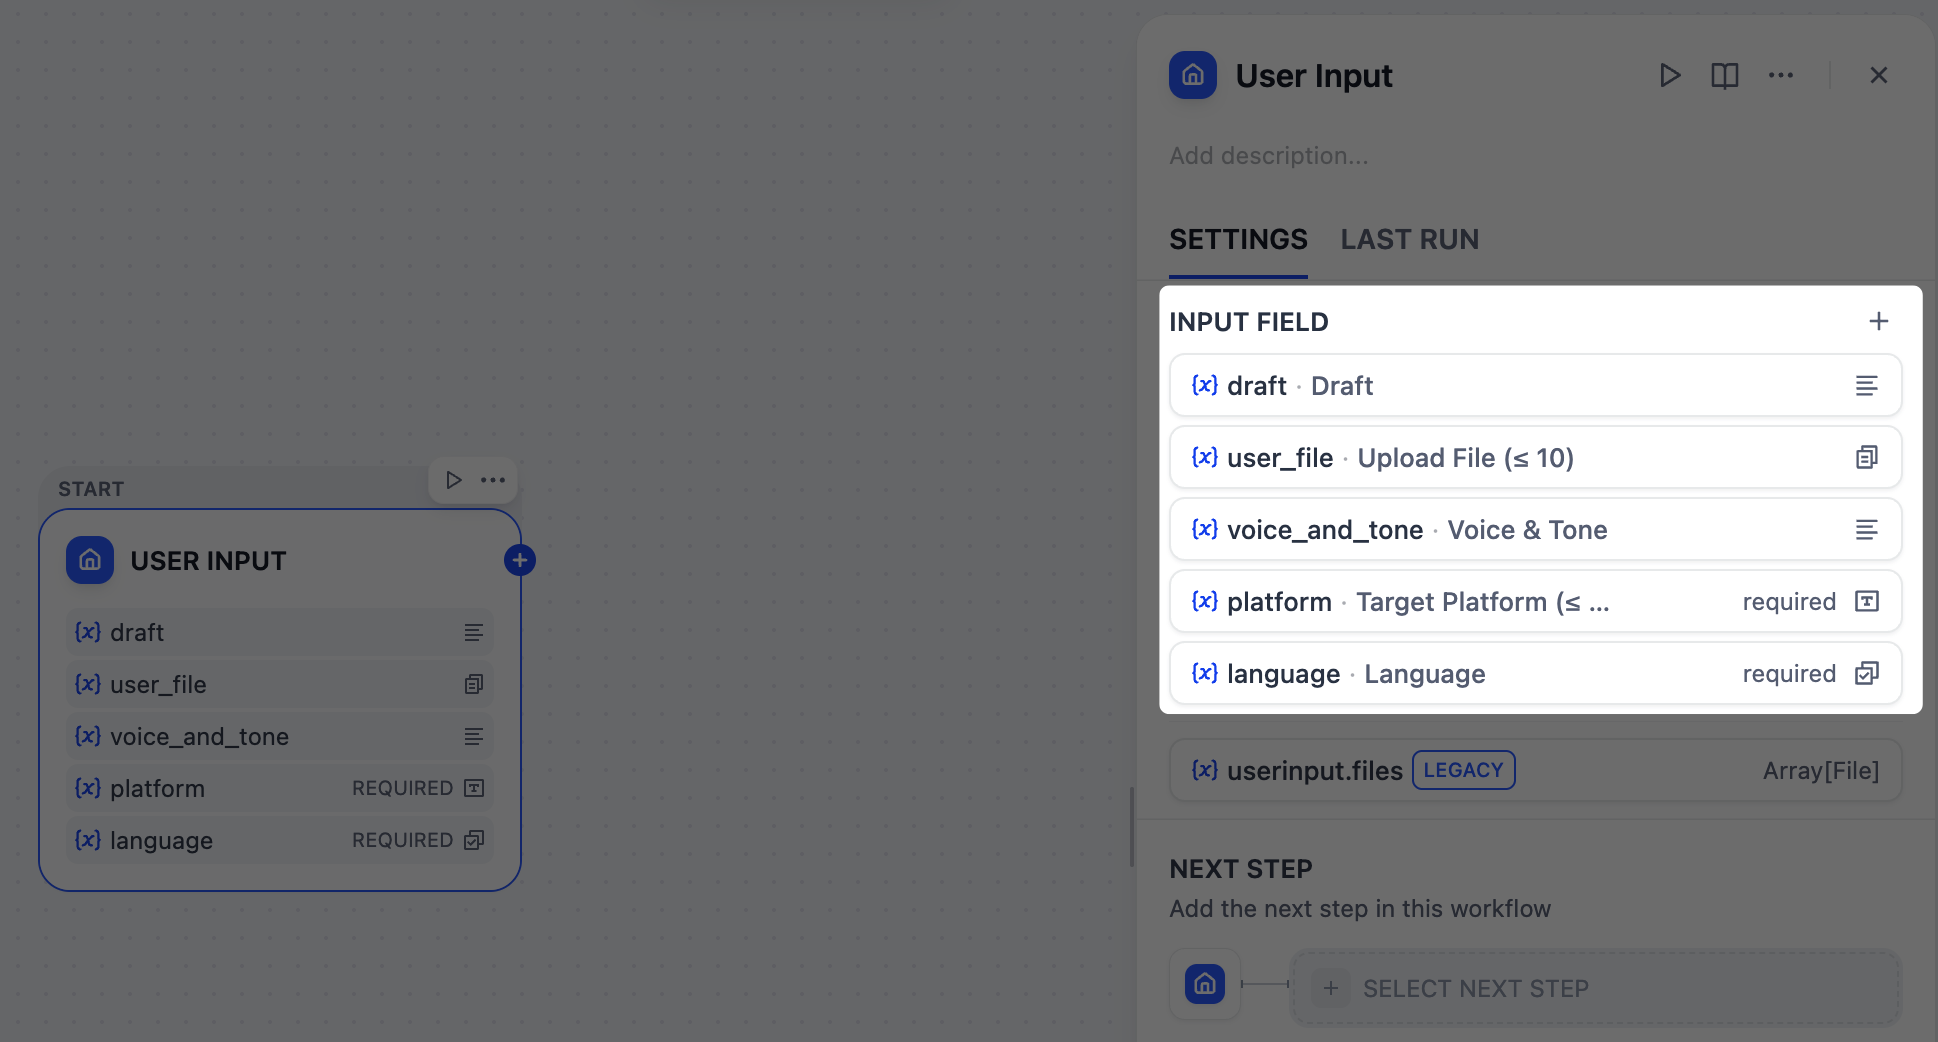
First, we need to define what information to gather from users for running our content generator, such as the draft text, target platforms, desired tone, and any reference materials.The User Input node is where we can easily set this up. Each input field we add here becomes a variable that all downstream nodes can reference and use.
Reference materials - text
Reference materials - text
- Field type:
Paragraph - Variable Name:
draft - Label Name:
Draft - Max length:
2048 - Required:
Yes
Reference materials - files
Reference materials - files
- Field type:
File list - Variable Name:
user_file - Label Name:
Upload File (≤ 10) - Support File Types:
Document,Image - Upload File Types:
Both - Max number of uploads:
10 - Required:
No
Voice and tone
Voice and tone
- Field type:
Paragraph - Variable Name:
voice_and_tone - Label Name:
Voice & Tone - Max length:
2048 - Required:
No
Target platform
Target platform
- Field type:
Short Text - Variable Name:
platform - Label Name:
Target Platform (≤ 10) - Max length:
256 - Required:
Yes
Language requirements
Language requirements
- Field type:
Select - Variable Name:
language - Label Name:
Language - Options:
English日本語简体中文
- Required:
Yes
2. Identify Target Platforms: Parameter Extractor Node
Since our platform field accepts free-form text input, users might type in various ways:
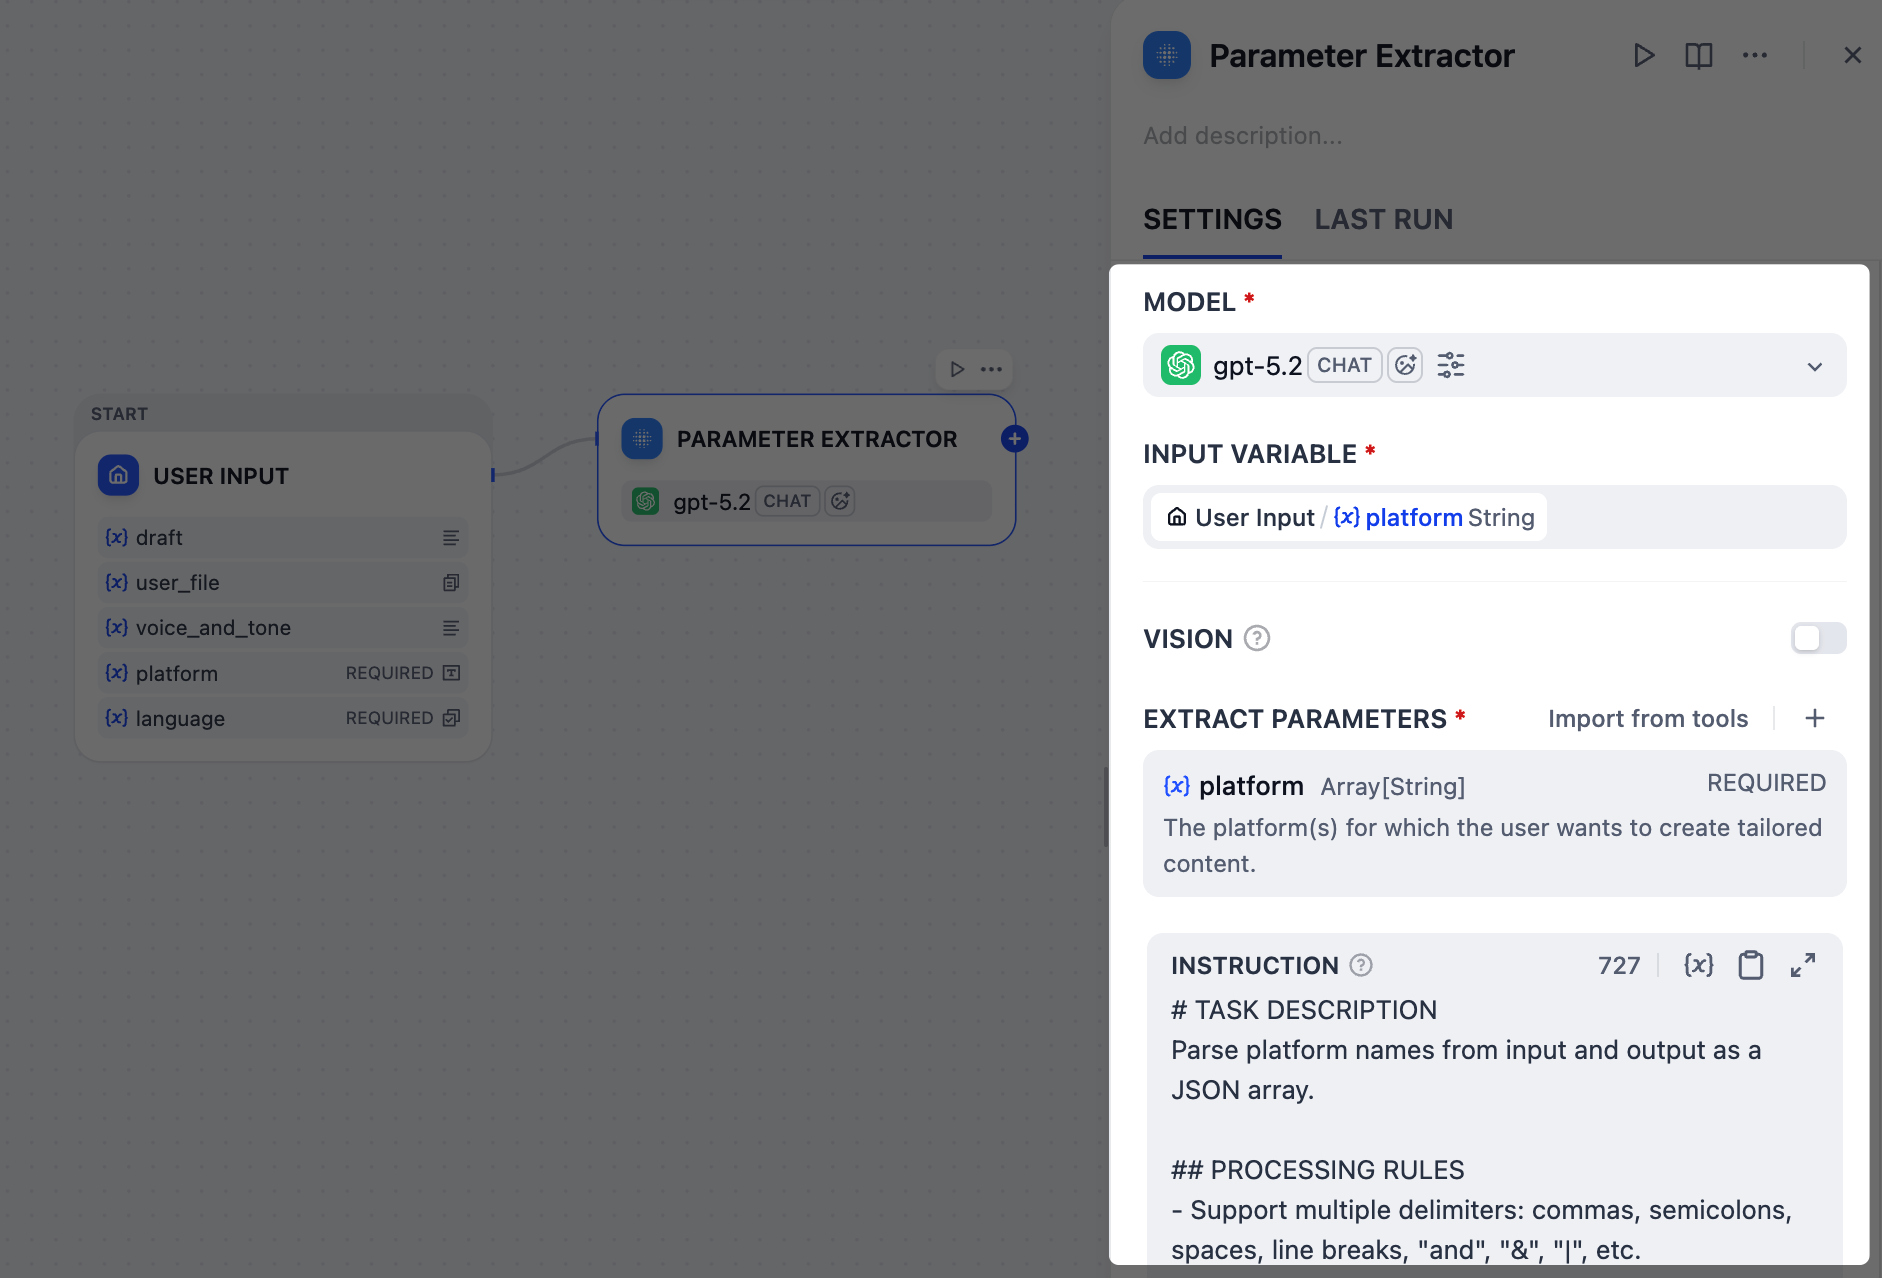
x and linkedIn, post on Twitter and LinkedIn, or even Twitter + LinkedIn please.However, we need a clean and structured list, like ["Twitter", "LinkedIn"], that downstream nodes can work with reliably.This is the perfect job for the Parameter Extractor node. In our case, it uses the gpt-5.2 model to analyze users’ natural language, recognize all these variations, and output a standardized array.-
In the Input Variable field, select
User Input/platform. -
Add an extract parameter:
-
Name:
platform -
Type:
Array[String] -
Description:
The platform(s) for which the user wants to create tailored content. -
Required:
Yes
-
Name:
-
In the Instruction field, paste the following to guide the LLM in parameter extraction:
INSTRUCTIONNote that we’ve instructed the LLM to output a specific error message for invalid inputs, which will serve as the end trigger for our workflow in the next step.
3. Validate Platform Extraction Results: IF/ELSE Node
What if a user enters an invalid platform name, like
ohhhhhh or BookFace? We don’t want to waste time and tokens generating useless content.In such cases, we can use an IF/ELSE node to create a branch that stops the workflow early. We’ll set a condition that checks for the error message from the Parameter Extractor node; if that message is detected, the workflow will route directly to an Output node and end.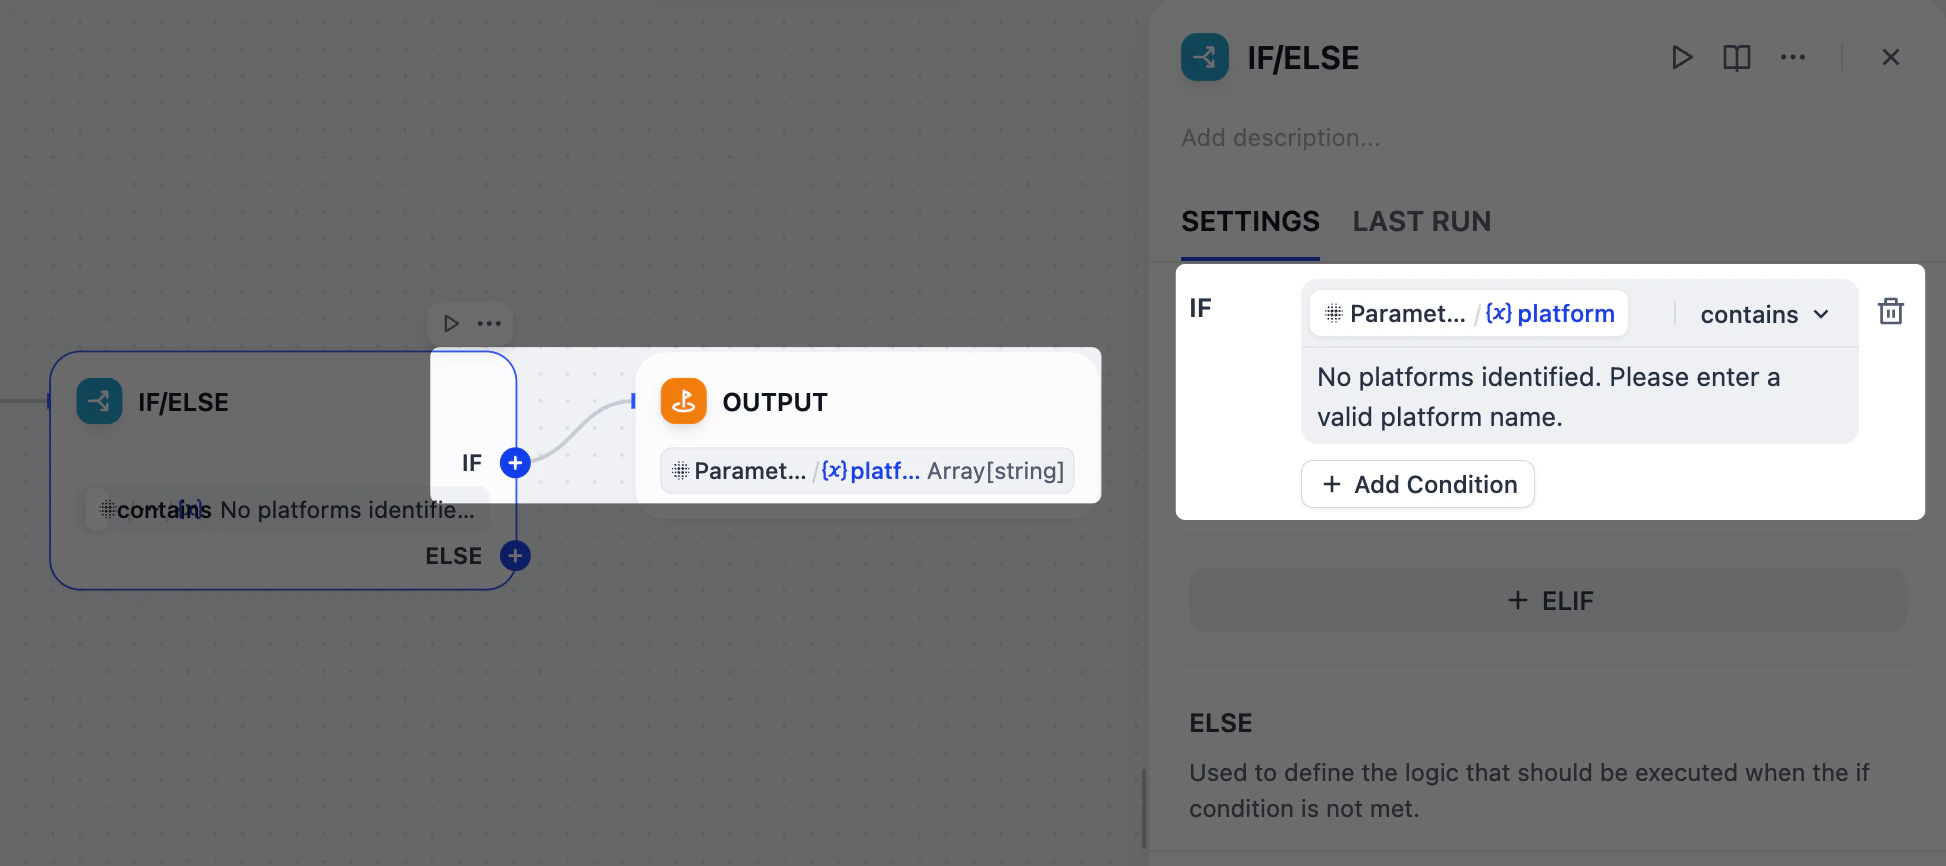
- After the Parameter Extractor node, add an IF/ELSE node.
-
On the IF/ELSE node’s panel, define the IF condition:
IF
Parameter Extractor/platformcontainsNo platforms identified. Please enter a valid platform name. - After the IF/ELSE node, add an Output node to the IF branch.
-
On the Output node’s panel, set
Parameter Extractor/platformas the output variable.
4. Separate Uploaded Files by Type: List Operator Node
Our users can upload both images and documents as reference materials, but these two types require different handling with
gpt-5.2: images can be interpreted directly via its vision capability, while documents must first be converted to text before the model can process them.To manage this, we’ll use two List Operator nodes to filter and split the uploaded files into separate branches: one for images and one for documents.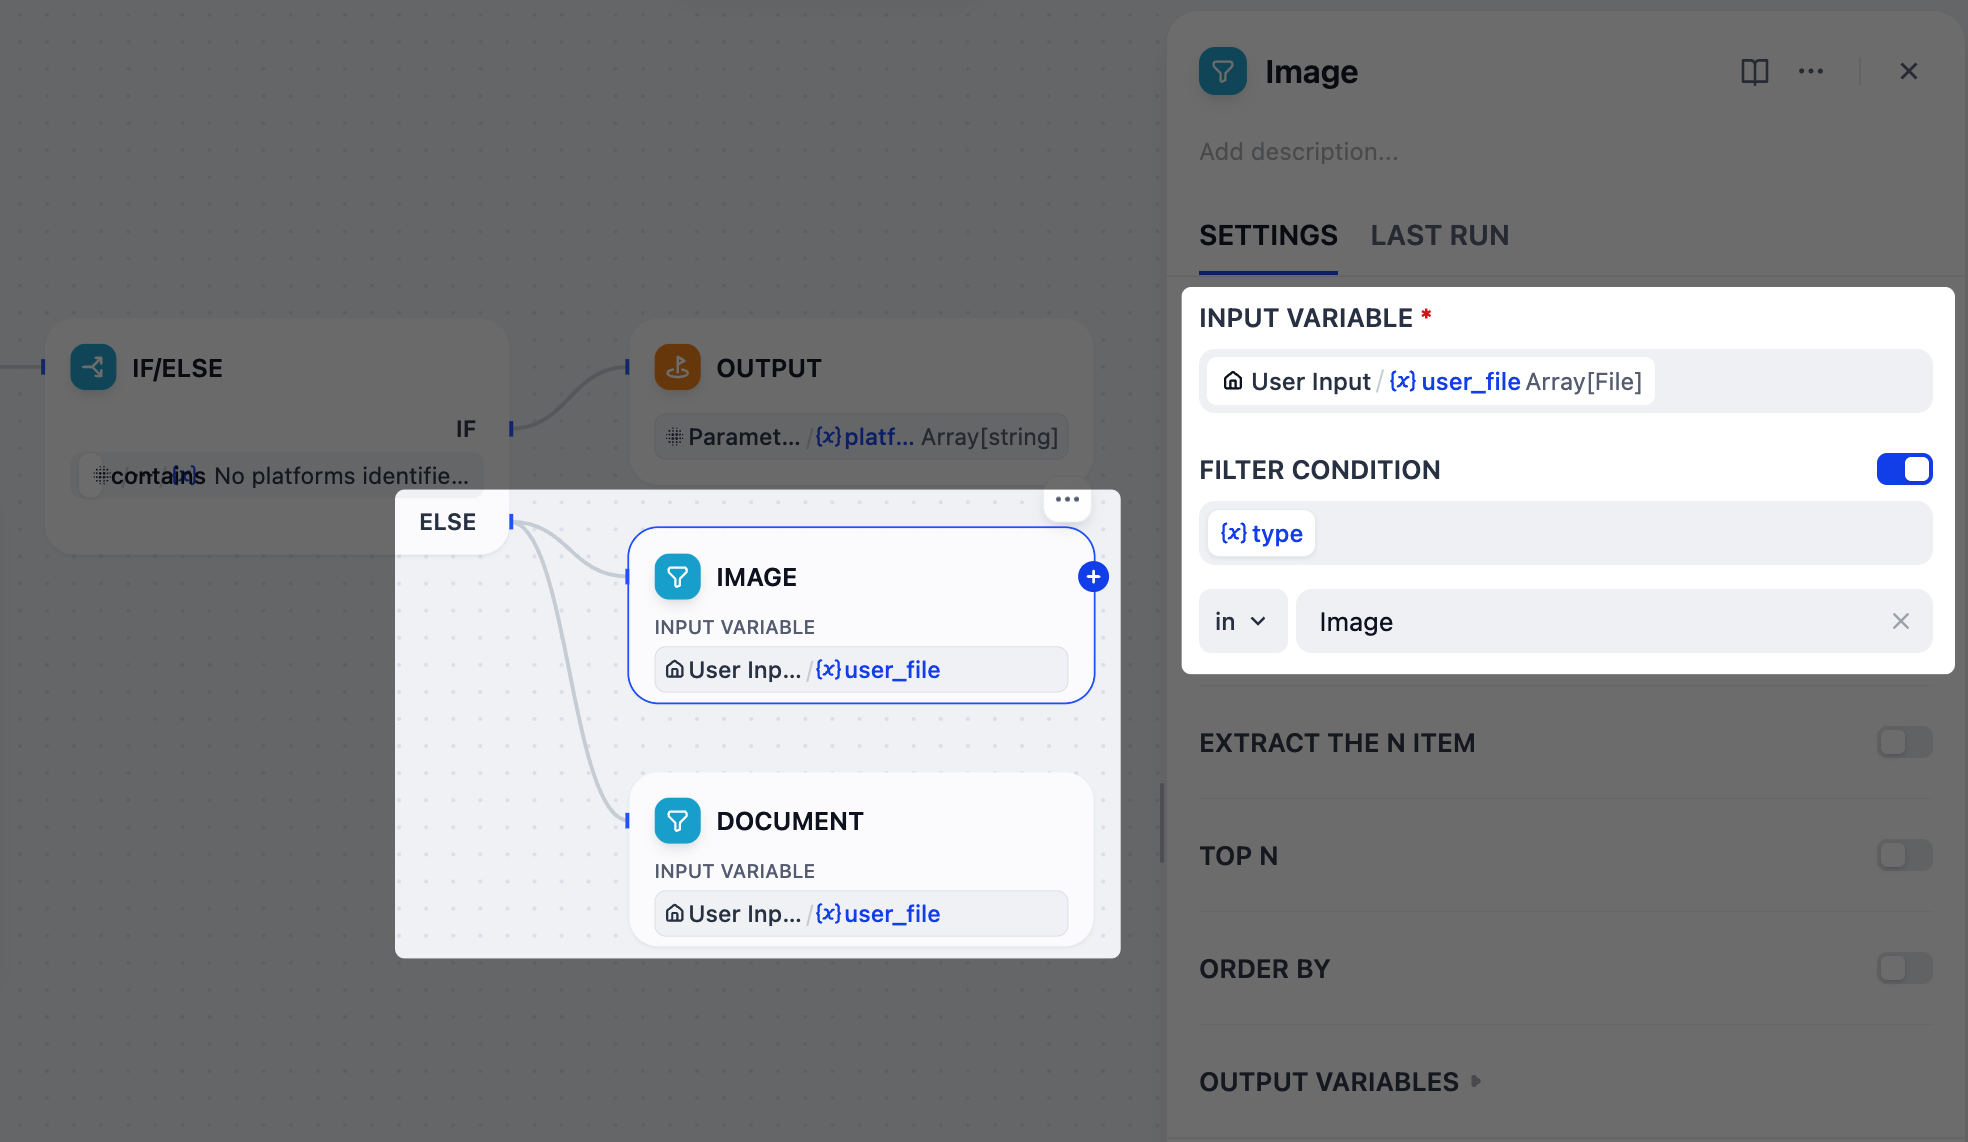
- After the IF/ELSE node, add two parallel List Operator nodes to the ELSE branch.
-
Rename one node to
Imageand the other toDocument. -
Configure the Image node:
-
Set
User Input/user_fileas the input variable. -
Enable Filter Condition:
{x}typeinImage.
-
Set
-
Configure the Document node:
-
Set
User Input/user_fileas the input variable. -
Enable Filter Condition:
{x}typeinDoc.
-
Set
5. Extract Text from Documents: Doc Extractor Node
gpt-5.2 cannot directly read uploaded documents like PDF or DOCX, so we must first convert them into plain text.This is exactly what a Doc Extractor node does. It takes document files as input and outputs clean, usable text for the next steps.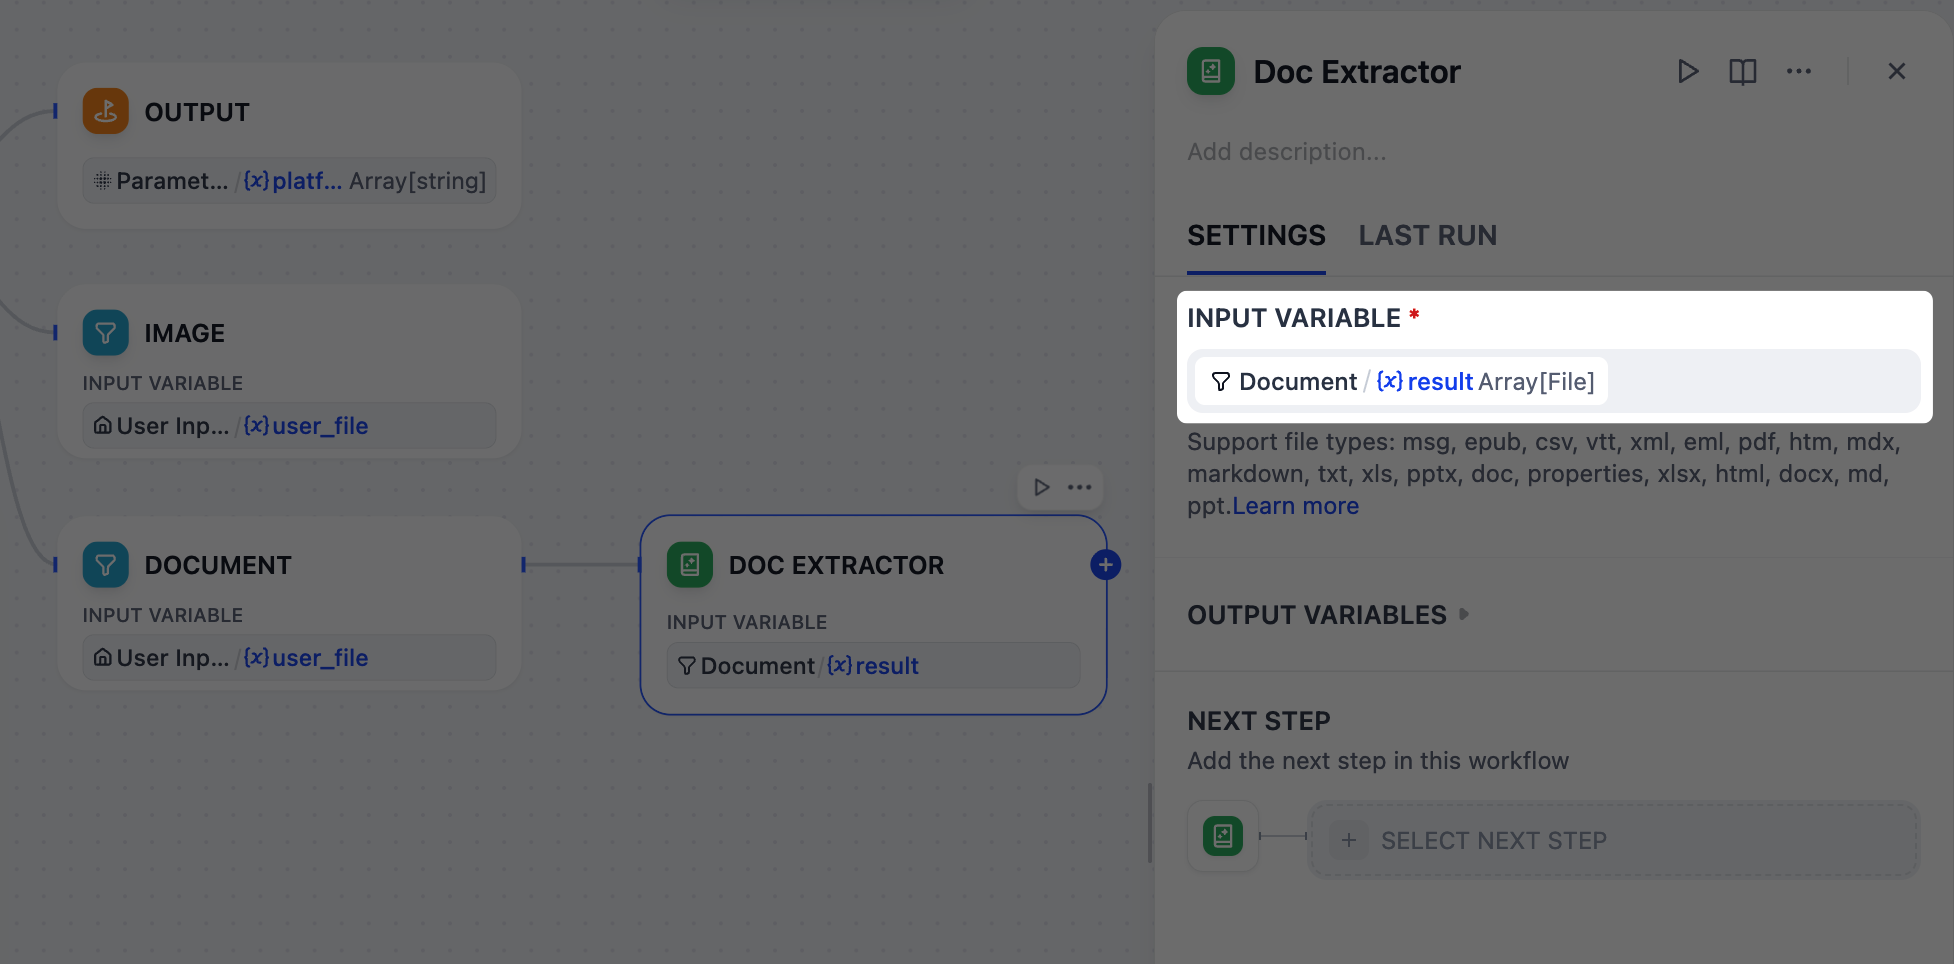
- After the Document node, add a Doc Extractor node.
-
On the Doc Extractor node’s panel, set
Document/resultas the input variable.
6. Integrate All Reference Materials: LLM Node
When users provide multiple reference types (draft text, documents, and images) simultaneously, we need to consolidate them into a single, coherent summary.An LLM node will handle this task by analyzing all the scattered pieces to create a comprehensive context that guides subsequent content generation.
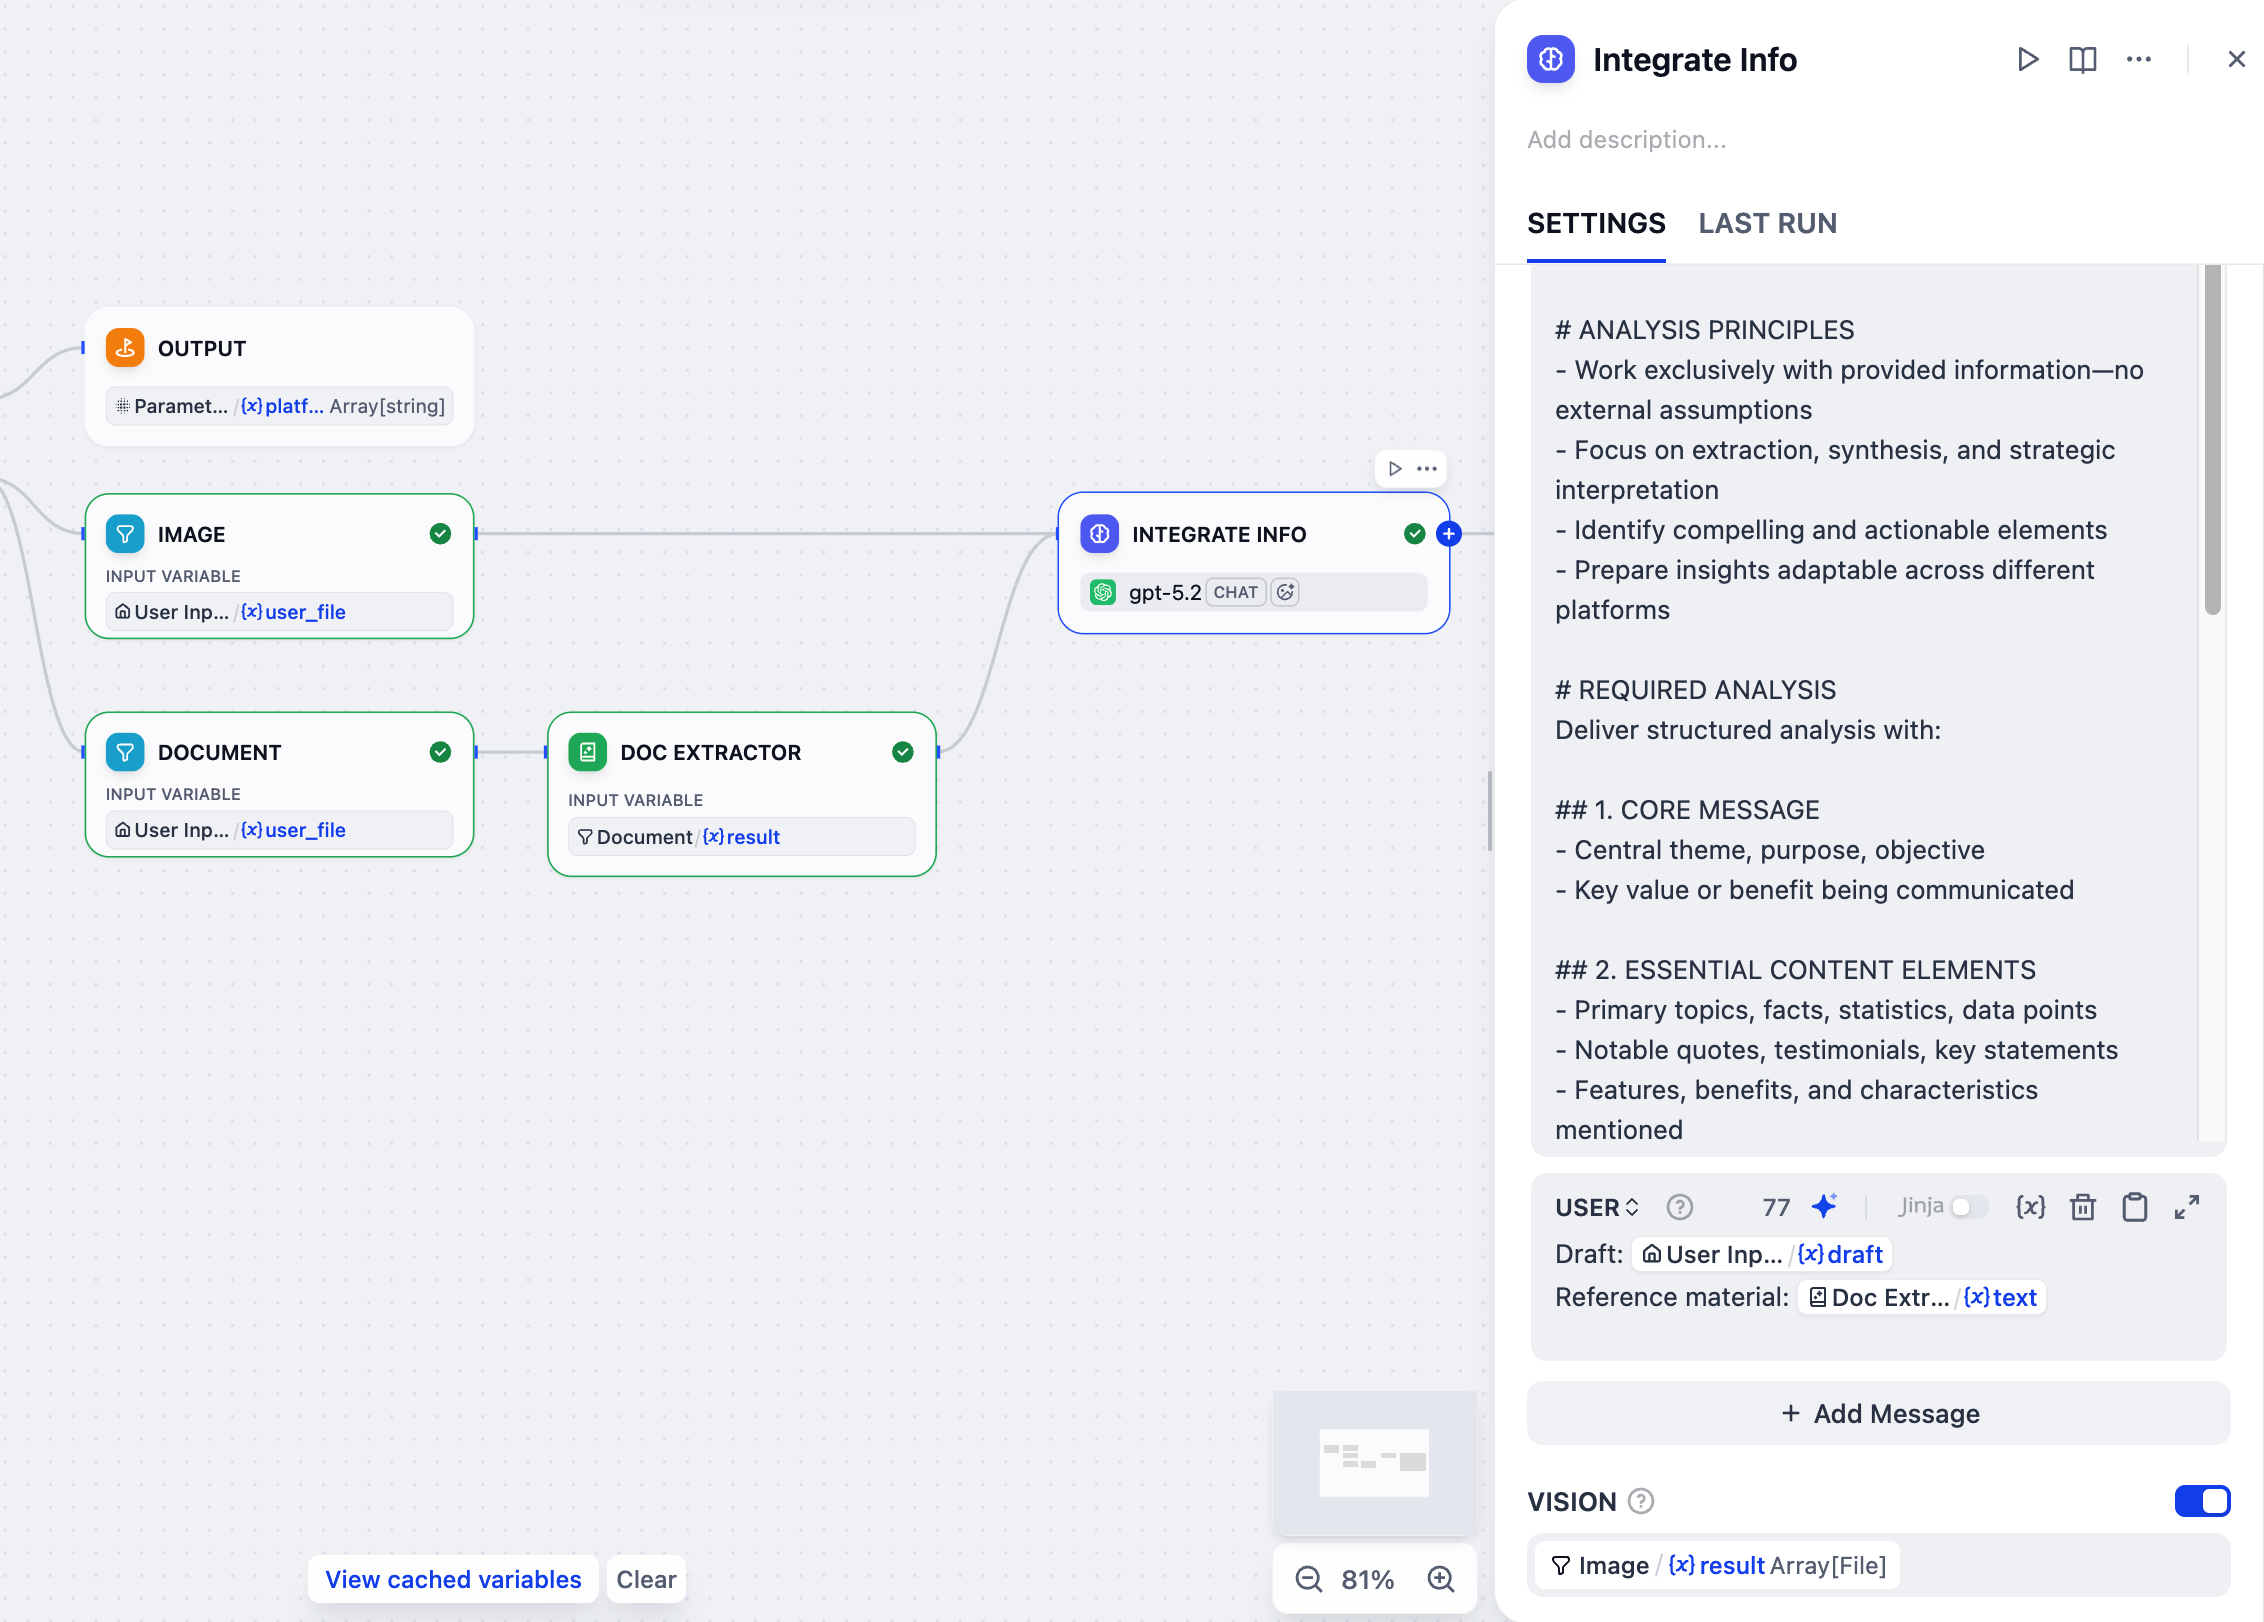
- After the Doc Extractor node, add an LLM node.
- Connect the Image node to this LLM node as well.
-
Click the LLM node to configure it:
-
Rename it to
Integrate Info. -
Enable VISION and set
Image/resultas the vision variable. -
In the system instruction field, paste the following:
-
Click Add Message to add a user message, then paste the following. Type
{or/to replaceDoc Extractor/textandUser Input/draftwith the corresponding variables from the list.USER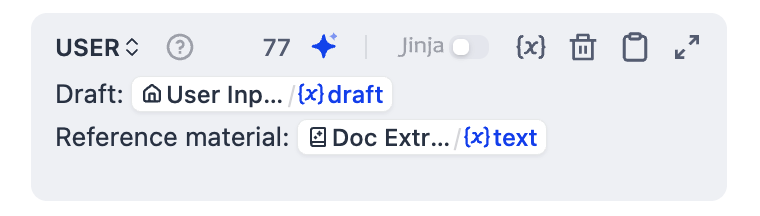
-
Rename it to
7. Create Customized Content for Each Platform: Iteration Node
Now that the integrated references and target platforms are ready, let’s generate a tailored post for each platform using an Iteration node.The node will loop through the list of platforms and run a sub-workflow for each: first analyze the specific platform’s style guidelines and best practices, then generate optimized content based on all available information.
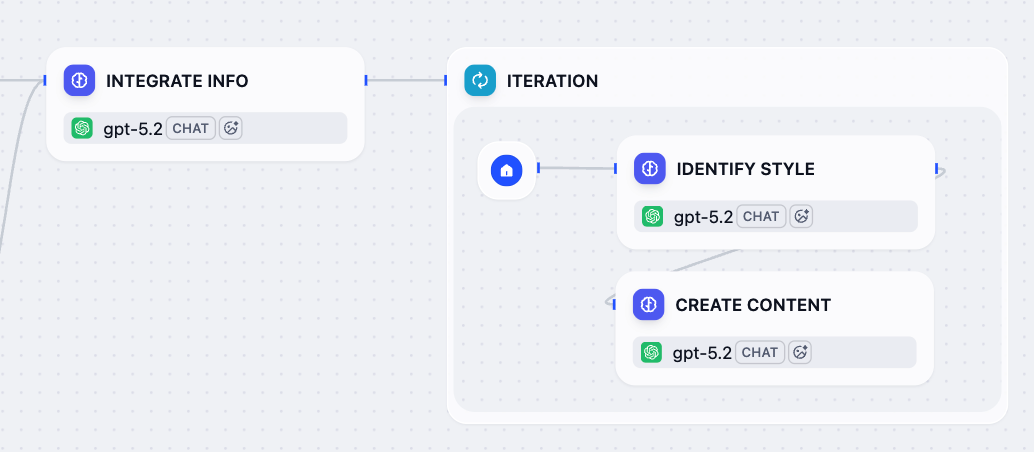
- After the Integrate Info node, add an Iteration node.
-
Inside the Iteration node, add an LLM node and configure it:
-
Rename it to
Identify Style. -
In the system instruction field, paste the following:
-
Click Add Message to add a user message, then paste the following. Type
{or/to replaceCurrent Iteration/itemwith the corresponding variable from the list.USER
-
Rename it to
-
After the Identify Style node, add another LLM node and configure it:
-
Rename it to
Create Content. -
In the system instruction field, paste the following:
-
Click Add Message to add a user message, then paste the following. Type
{or/to replace all inputs with the corresponding variable from the list.USER -
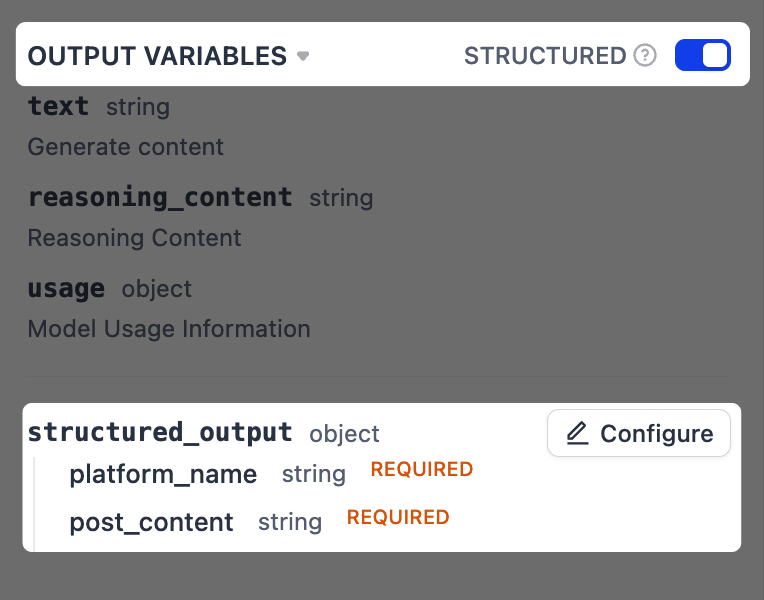
Enable structured output.
This allows us to extract specific pieces of information from the LLM’s response in a more reliable way, which is crucial for the next step where we format the final output.
-
Next to Output Variables, toggle Structured on. The
structured_outputvariable will appear below. Click Configure. -
In the pop-up schema editor, click Import From JSON in the top-right corner, and paste the following:

-
Next to Output Variables, toggle Structured on. The
-
Rename it to
-
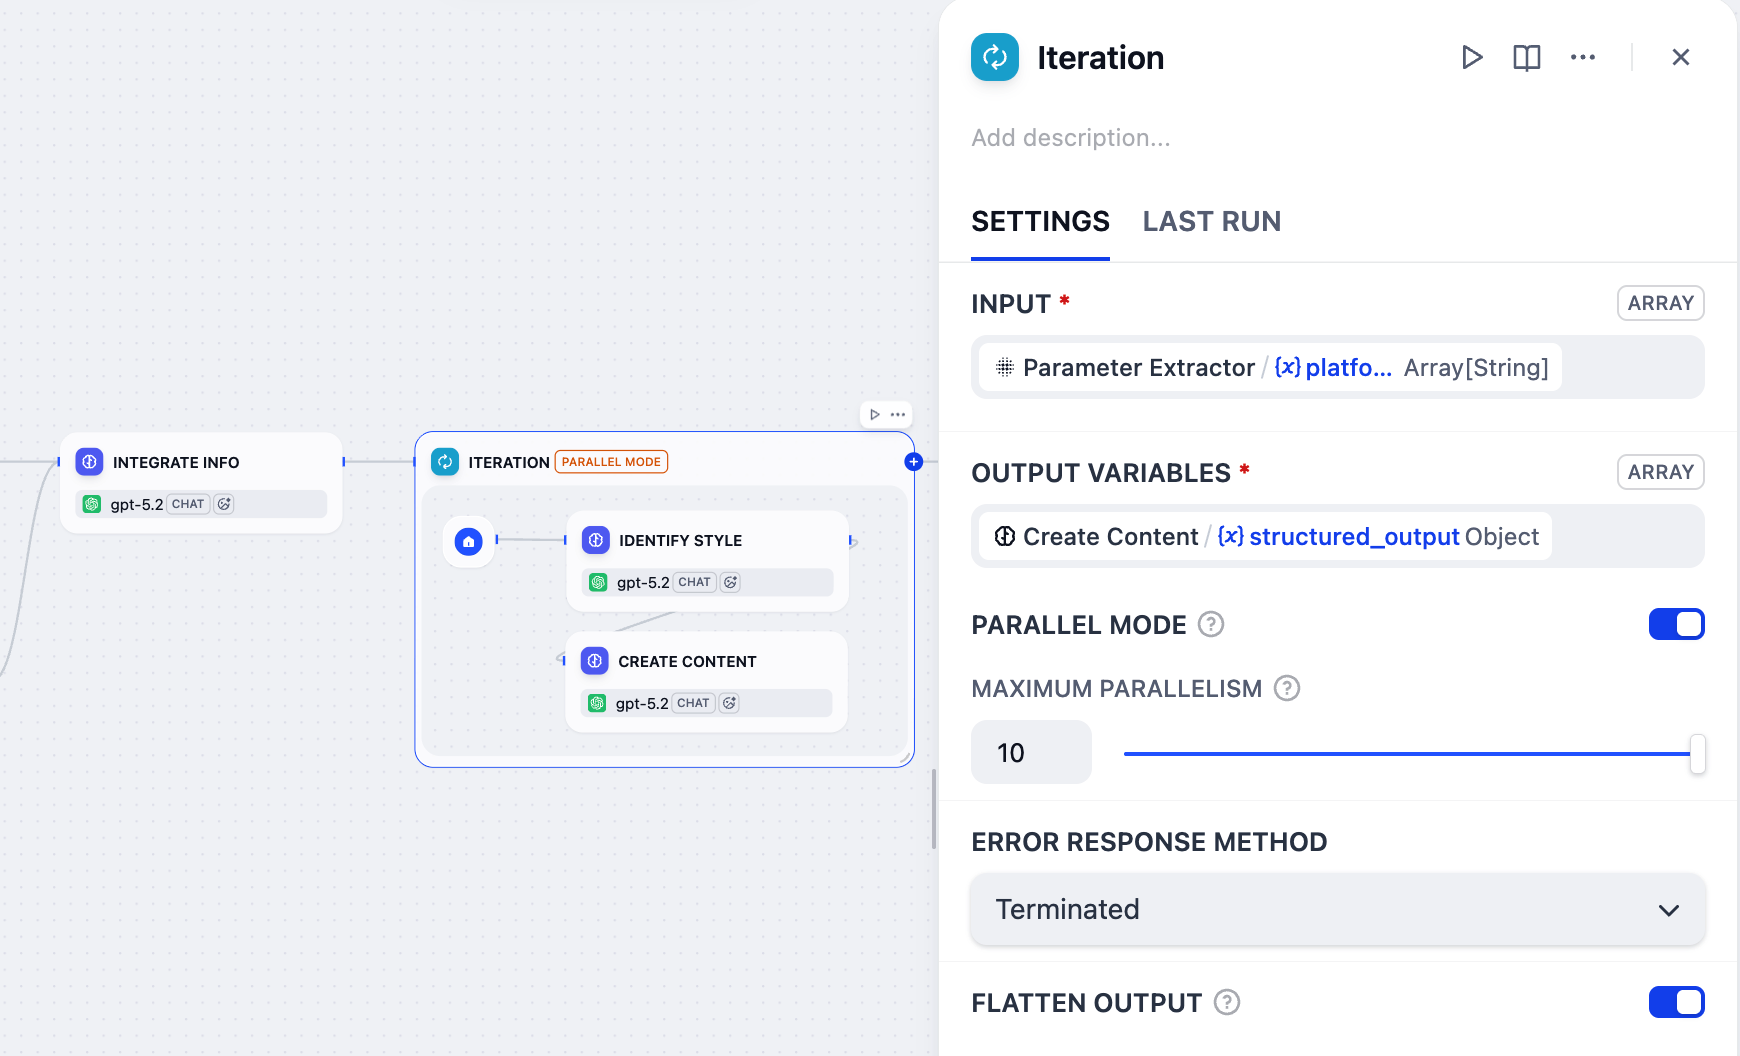
Click the Iteration node to configure it:
-
Set
Parameter Extractor/platformas the input variable. -
Set
Create Content/structured_outputas the output variable. -
Enable Parallel Mode and set the maximum parallelism to
10.This is why we included(≤10)in the label name for the target platform field back in the User Input node.
-
Set
8. Format the Final Output: Template Node
The Iteration node generates a post for each platform, but its output is a raw array of data (e.g.,
[{"platform_name": "Twitter", "post_content": "..."}]) that isn’t very readable. We need to present the results in a clearer format.That’s where the Template node comes in. It lets us format this raw data into well-organized text using Jinja2 templating, ensuring the final output is user-friendly and easy to read.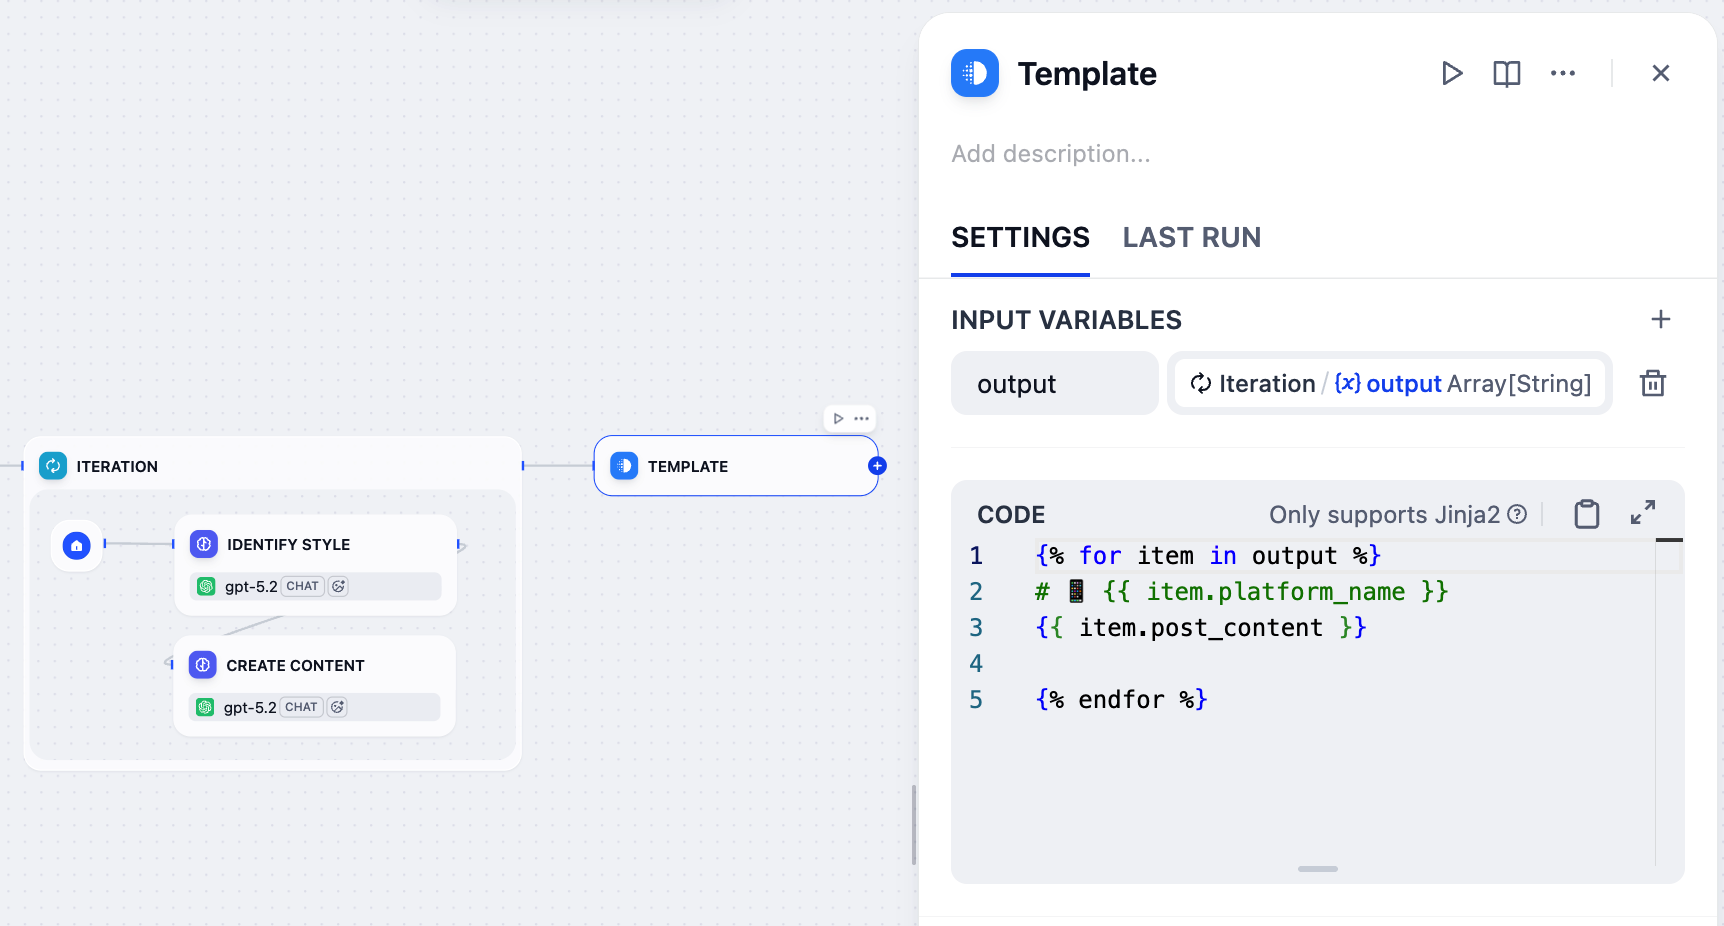
- After the Iteration node, add a Template node.
-
On the Template node’s panel, set
Iteration/outputas the input variable and name itoutput. -
Paste the following Jinja2 code:
{% for item in output %}/{% endfor %}: Loops through each platform-content pair in the input array.{{ item.platform_name }}: Displays the platform name as an H1 heading with a phone emoji.{{ item.post_content }}: Displays the generated content for that platform.- The blank line between
{{ item.post_content }}and{% endfor %}adds spacing between platforms in the final output.
9. Return the Results to Users: Output Node
- After the Template node, add an Output node.
- On the Output node’s panel, set the
Template/outputas the output variable.
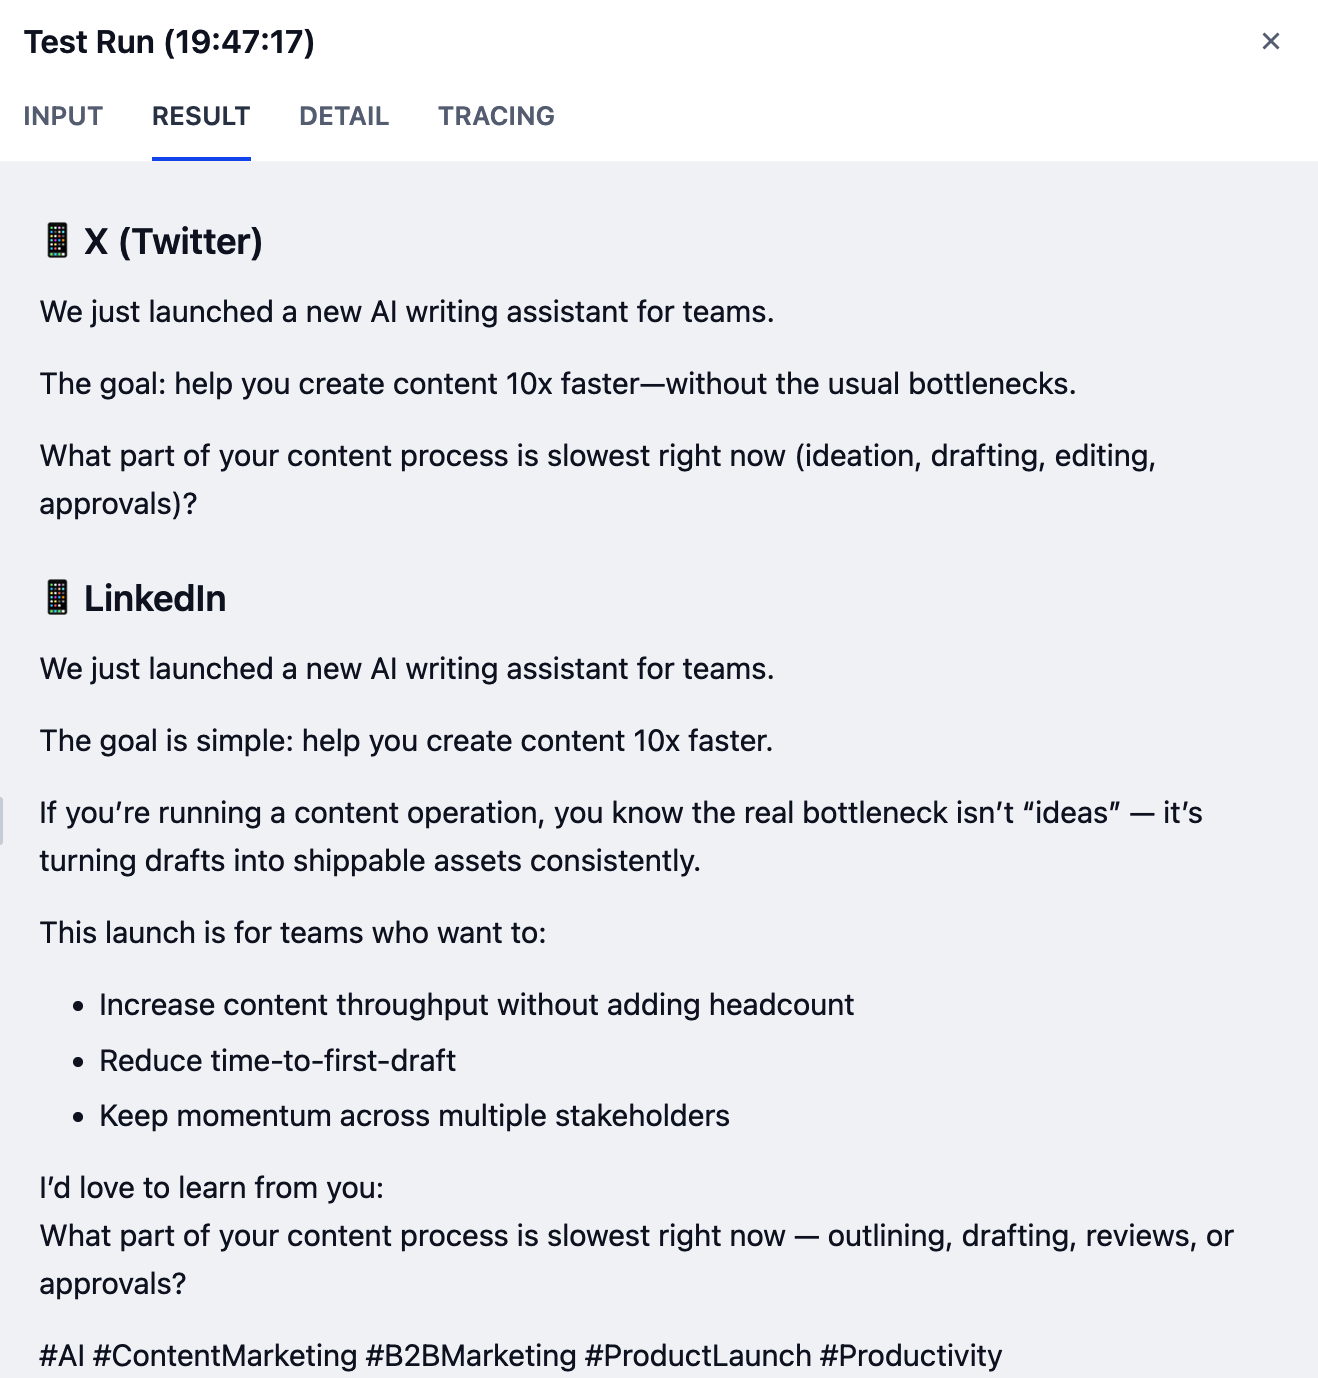
Step 3: Test
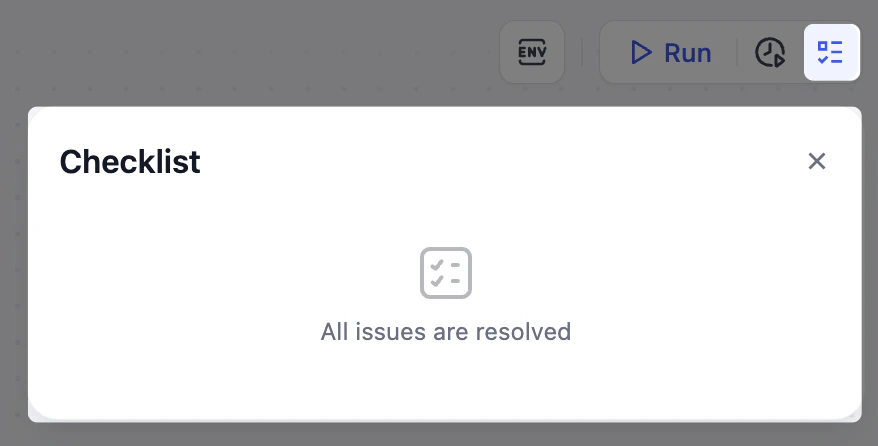
Your workflow is now complete! Let’s test it out.-
Make sure your Checklist is clear.
- Check your workflow against the reference diagram provided at the beginning to ensure all nodes and connections match.
-
Click Test Run in the top-right corner, fill in the input fields, then click Start Run.
If you’re not sure what to enter, try these sample inputs:
-
Draft:
We just launched a new AI writing assistant that helps teams create content 10x faster. - Upload File: Leave empty
-
Voice & Tone:
Friendly and enthusiastic, but professional -
Target Platform:
Twitter and LinkedIn -
Language:
English
-
Draft:
Your results may vary depending on the model you’re using. Higher-capability models generally produce better output quality.