

Prerequisites
- Dify plugin scaffolding tool
- Python environment, version ≥ 3.12
Creating a New Project
In the current path, run the scaffolding command line tool to create a new Dify plugin project.dify and copied it to the /usr/local/bin path, you can run the following command to create a new plugin project:
1. Filling in Plugin Information
Follow the prompts to configure the plugin name, author information, and plugin description. If you are working collaboratively as a team, you can also enter an organization name as the author.The plugin name must be 1-128 characters long and can only contain letters, numbers, hyphens, and underscores.
 Once completed, select Python as the plugin development language.

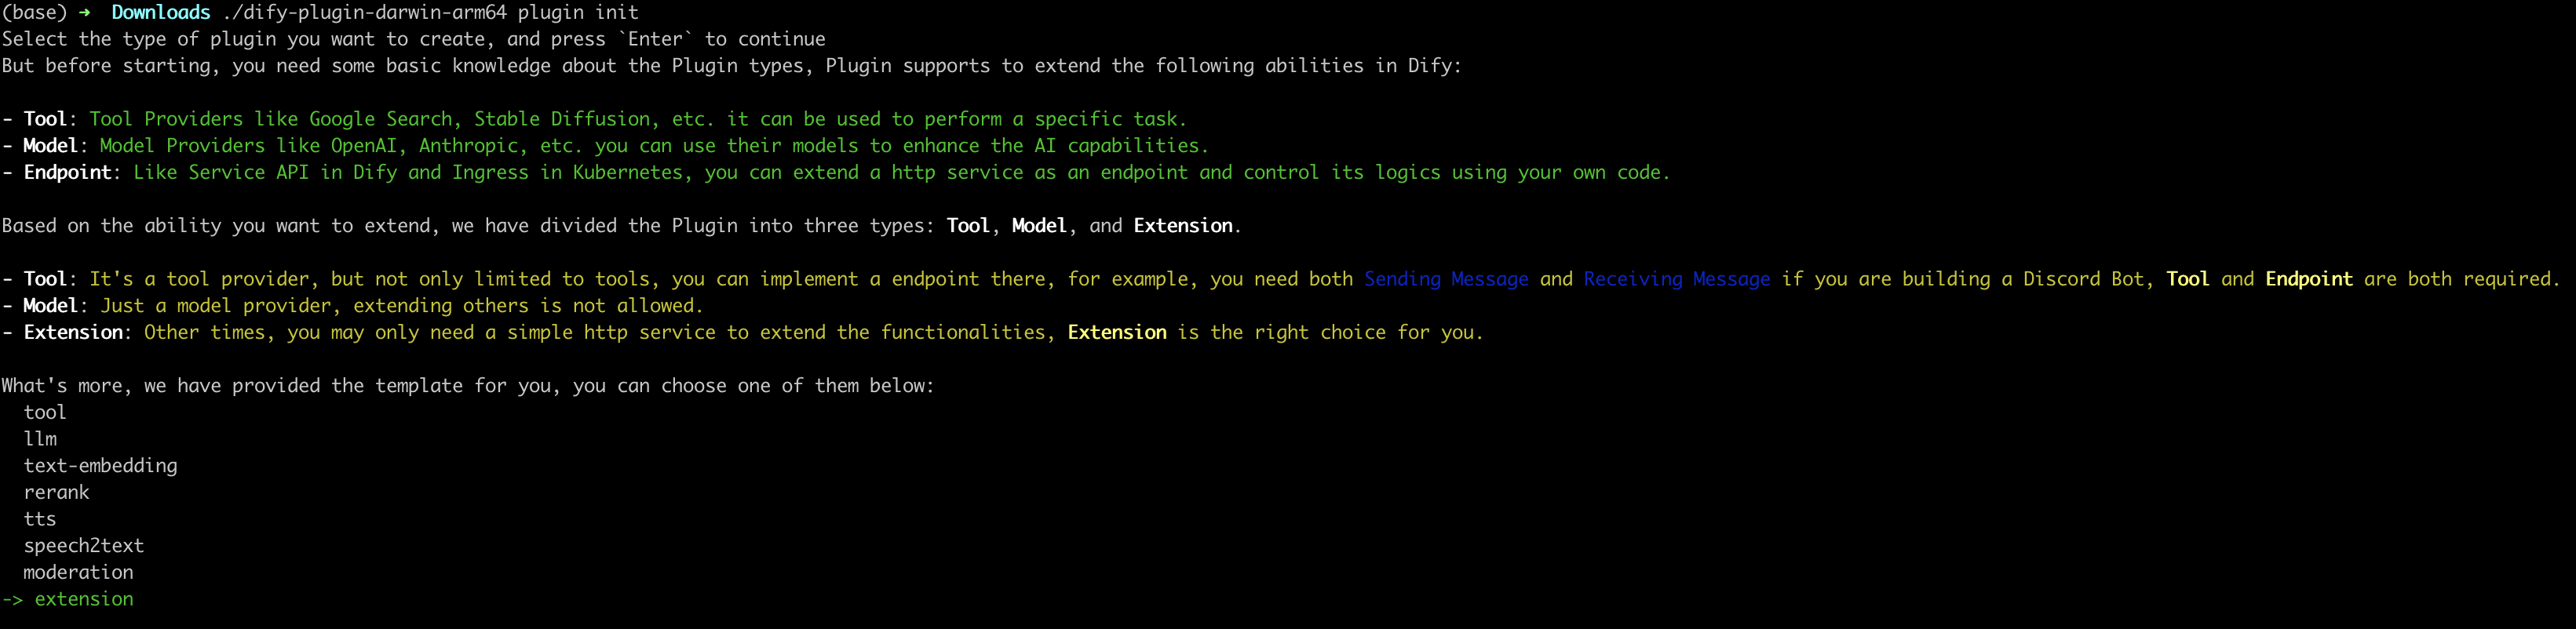
2. Select Plugin Type and Initialize Project Template
All templates in the scaffolding tool provide complete code projects. For demonstration purposes, this article will use theExtension type plugin template as an example. For developers already familiar with plugin development, templates are not necessary, and you can refer to the interface documentation to guide the development of different types of plugins.
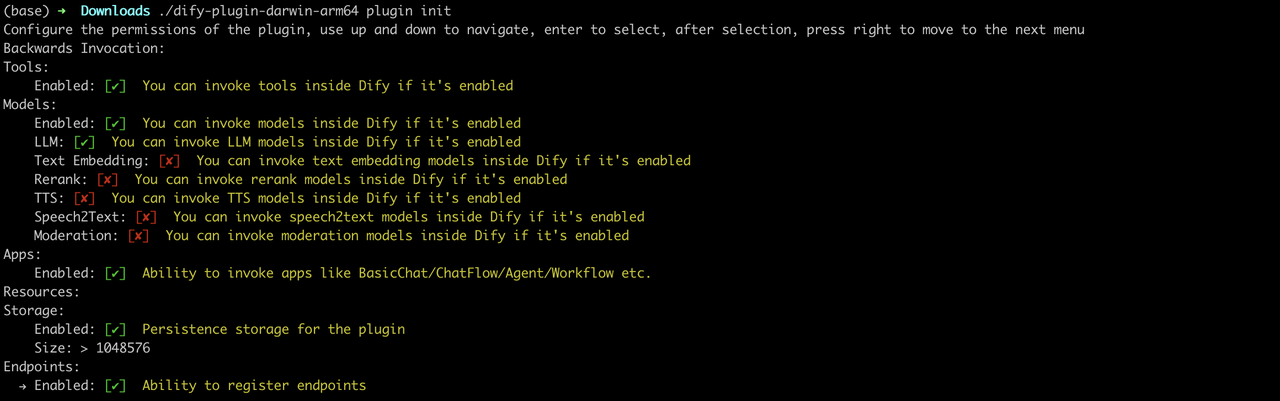
3. Configure Plugin Permissions
The plugin also needs permissions to read from the Dify main platform to connect properly. Grant the following permissions to this example plugin:- Tools
- LLMs
- Apps
- Enable persistent storage Storage, allocate default size storage
- Allow registering Endpoints
Use the arrow keys in the terminal to select permissions, and use the “Tab” button to grant permissions.After checking all permission items, press Enter to complete the plugin creation. The system will automatically generate the plugin project code.
 The basic file structure of the plugin includes the following:
GUIDE.mdA short tutorial guiding you through the plugin writing process.README.mdBrief introduction about the current plugin, where you need to fill in the introduction and usage instructions for the plugin._assetsStores all multimedia files related to the current plugin.endpointsAnExtensiontype plugin template created according to the CLI guidance, this directory stores all Endpoint implementation code.groupSpecifies the key type, multilingual settings, and the file path of the API definition.main.pyThe entry file for the entire project.manifest.yamlThe basic configuration file for the entire plugin, containing configuration information such as what permissions the plugin needs and what type of extension it is.requirements.txtStores Python environment dependencies.
Developing the Plugin
1. Define the Plugin’s Request Entry Point (Endpoint)
Editendpoints/test_plugin.yaml, referring to the following code for modification:
/neko, with the request method as GET type. The plugin’s functional implementation code is in the endpoints/test_plugin.py file.
2. Write Plugin Functionality
Plugin functionality: Request service, output a Nyan Cat. Write the plugin’s functional implementation code in theendpoints/test_plugin.py file, referring to the following example code:
Debugging the Plugin
Next, you need to test whether the plugin can function properly. Dify provides a remote debugging method. Go to the “Plugin Management” page to obtain the debugging Key and remote server address.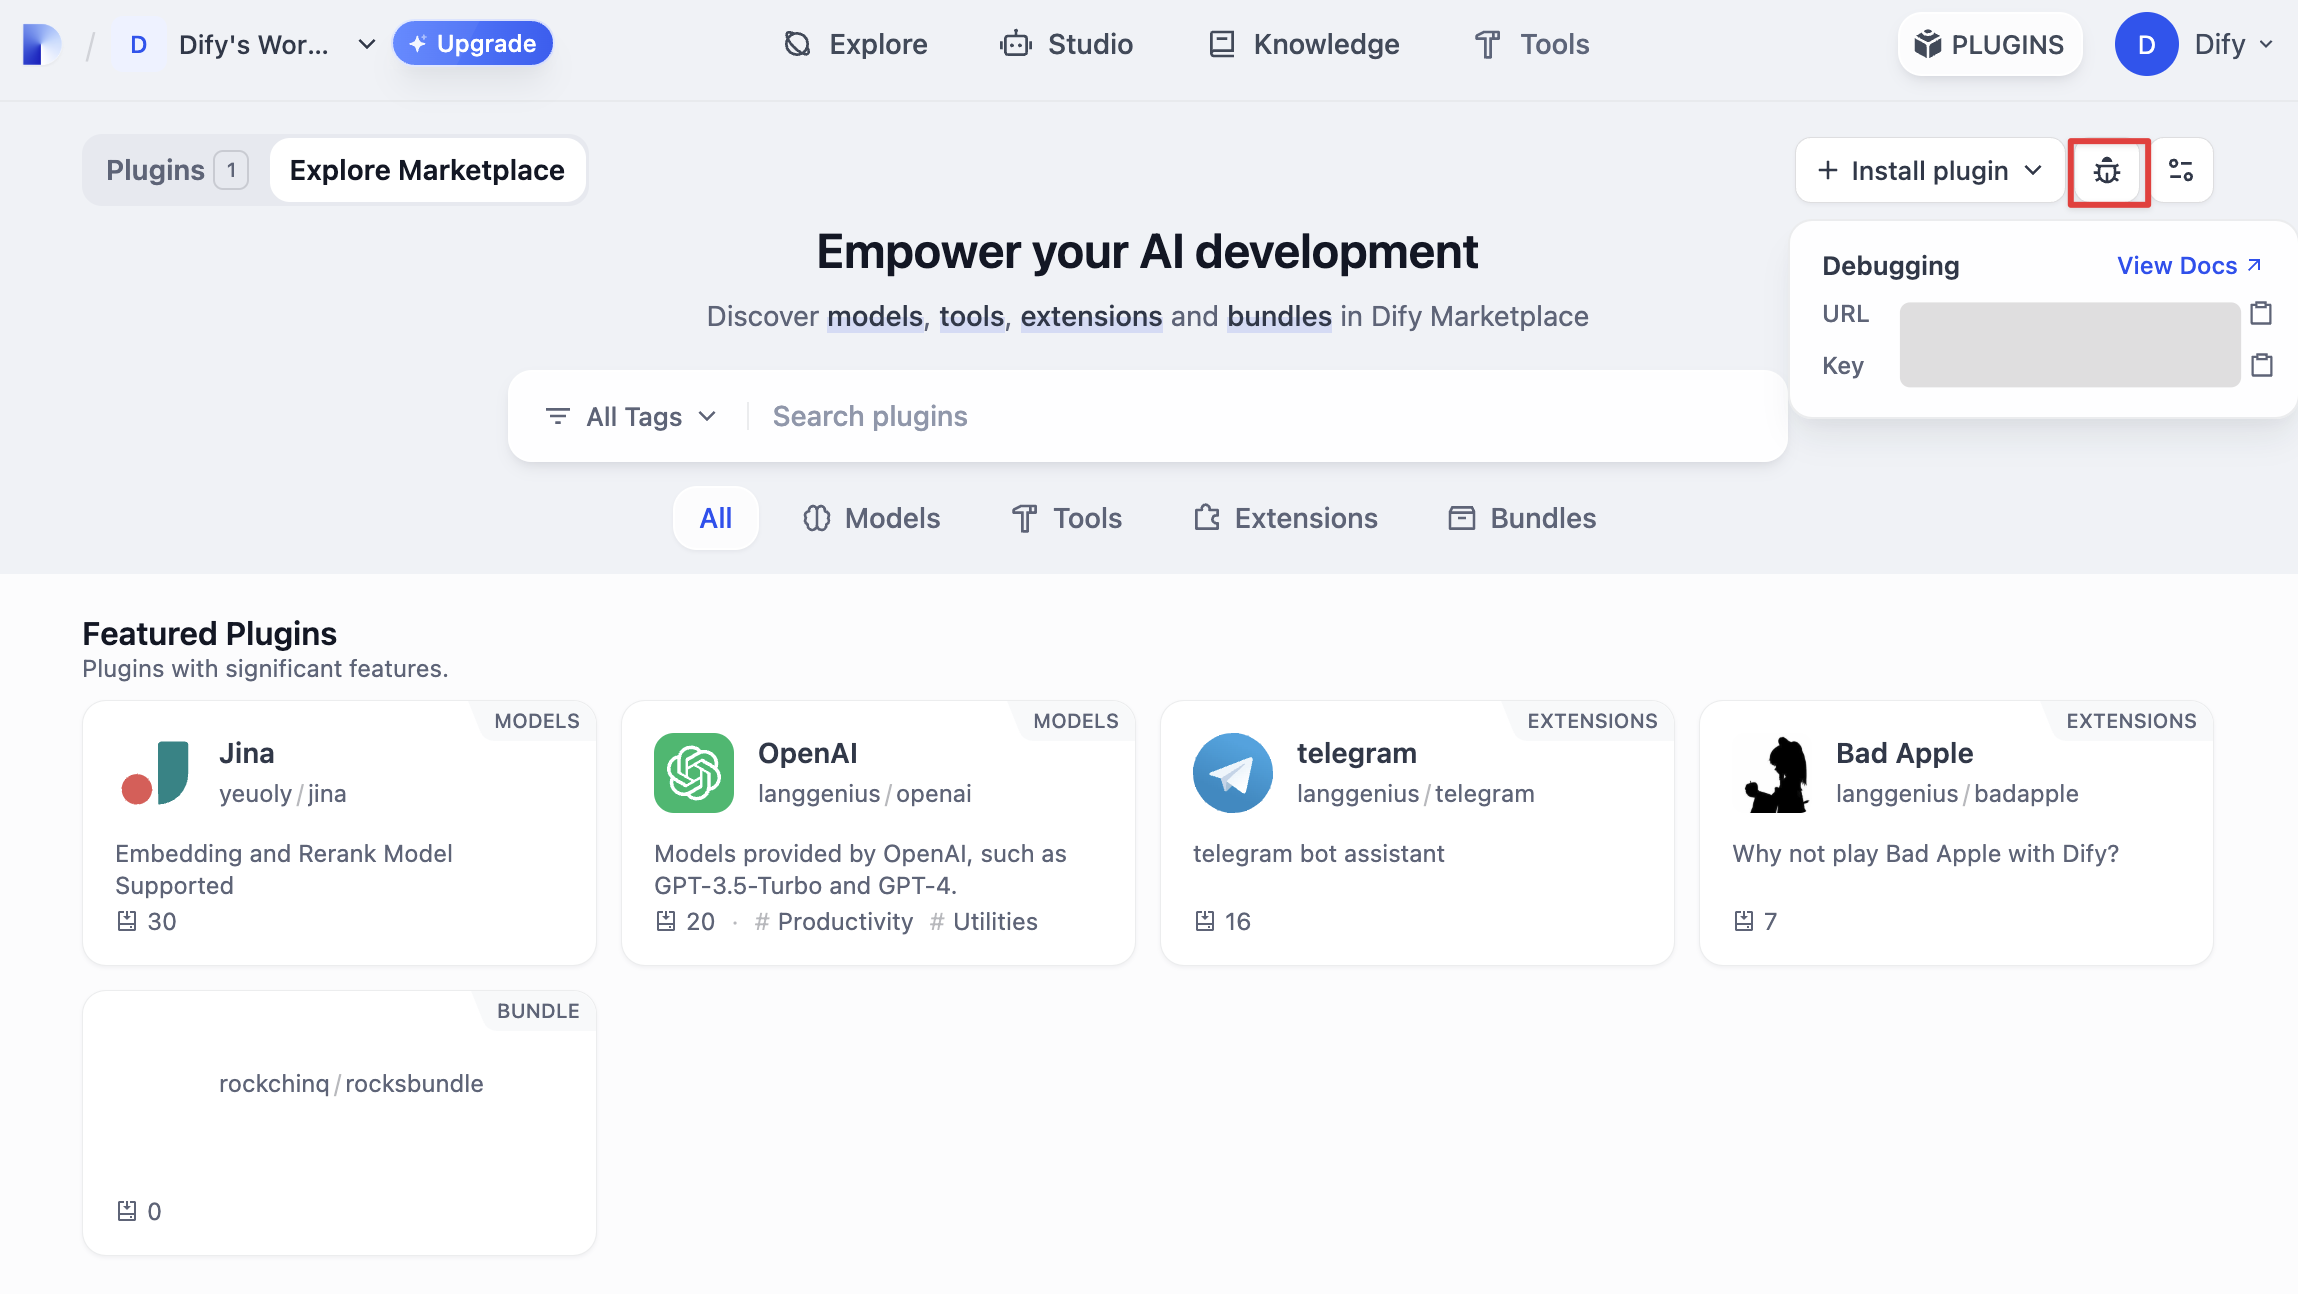 Return to the plugin project, copy the
 .env.example file and rename it to .env, then fill in the remote server address and debugging Key information you obtained.
.env file
python -m main command to start the plugin. On the plugins page, you can see that the plugin has been installed in the Workspace. Other team members can also access the plugin.
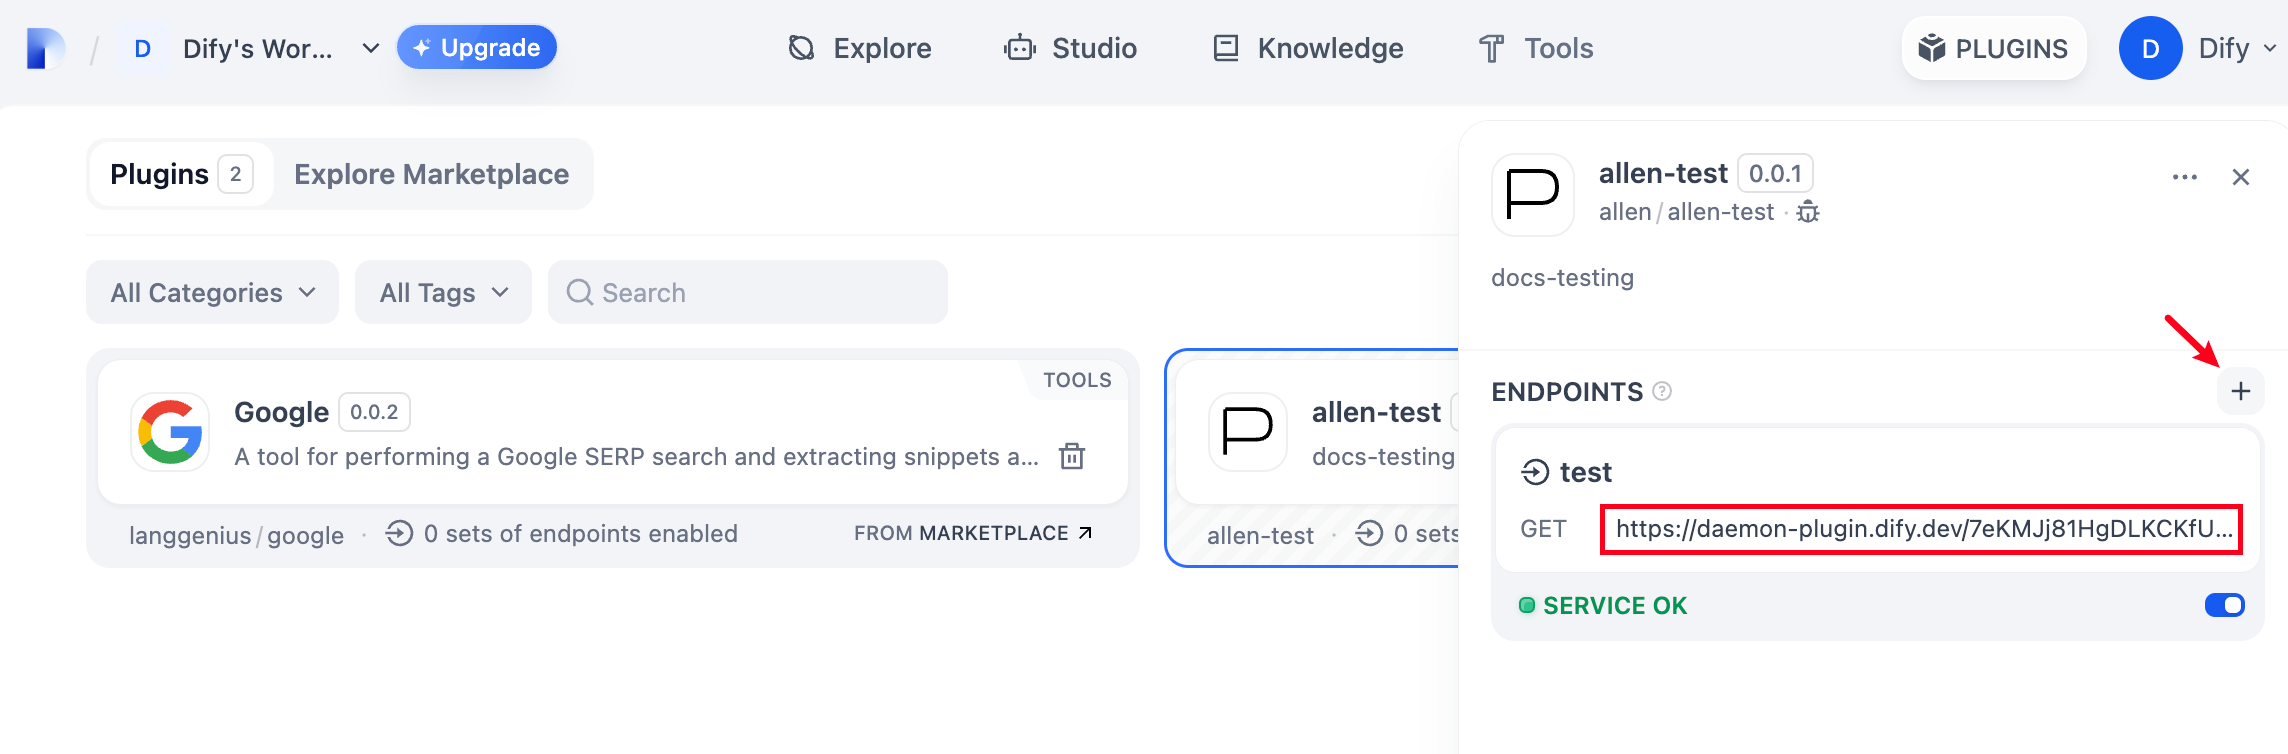
 Add a new Endpoint in the plugin, fill in the name and
 api_key information as desired. Visit the automatically generated URL to see the web service provided by the plugin.
Packaging the Plugin
After confirming that the plugin can run normally, you can package and name the plugin using the following command line tool. After running, you will discover aneko.difypkg file in the current folder, which is the final plugin package.
Publishing the Plugin
Now you can upload it to the Dify Plugins code repository to publish your plugin! Before uploading, please ensure that your plugin follows the plugin publishing specifications. After the review is approved, the code will be merged into the main branch and automatically launched to the Dify Marketplace.Explore More
Quick Start: Plugin Interface Documentation:- Manifest Structure
- Endpoint Detailed Definition
- Reverse Invocation of Dify Capabilities
- Tools
- Models
- Extending Agent Strategies
Edit this page | Report an issue