Use this file to discover all available pages before exploring further.
Imagine setting up a factory production line where each station (node) performs a specific task, and you connect them to assemble widgets into a final product. This is knowledge pipeline orchestration—a visual workflow builder that allows you to configure data processing sequences through a drag-and-drop interface. It provides control over document ingestion, processing, chunking, indexing, and retrieval strategies.In this section, you’ll learn about the knowledge pipeline process, understand different nodes, how to configure them, and customize your own data processing workflows to efficiently manage and optimize your knowledge base.
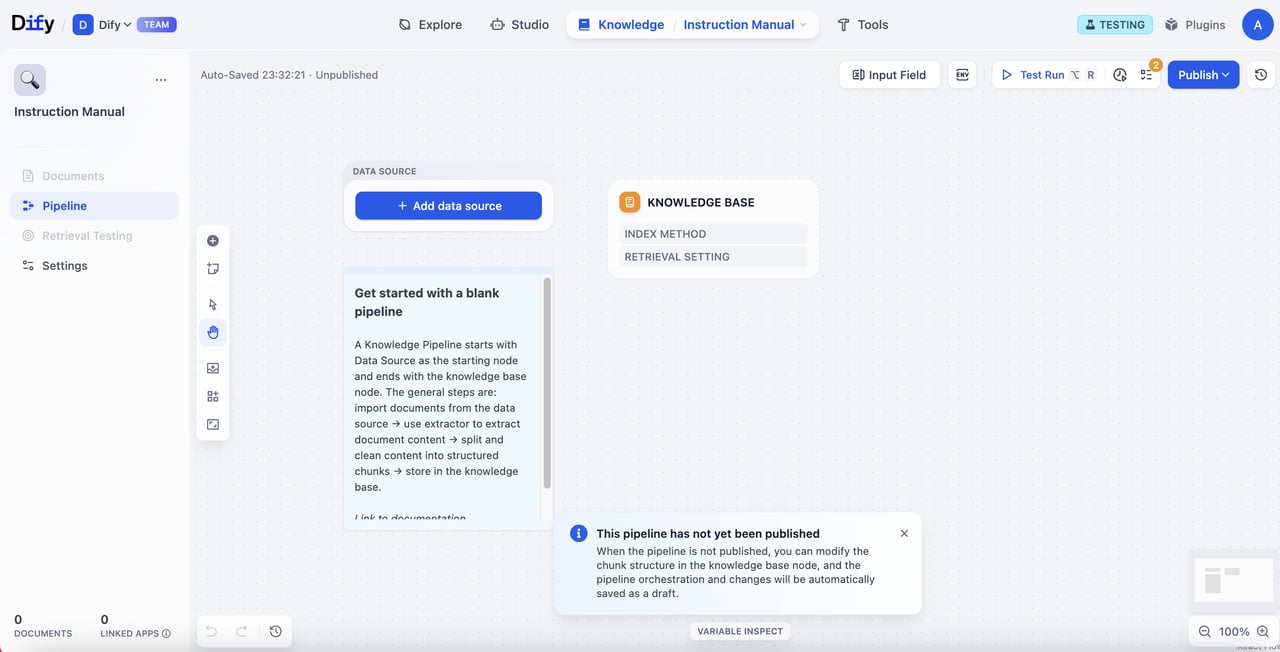
When entering the knowledge pipeline orchestration canvas, you’ll see:
Tab Status: Documents, Retrieval Test, and Settings tabs will be grayed out and unavailable at the moment
Essential Steps: You must complete knowledge pipeline orchestration and publishing before uploading files
Your starting point depends on the template choice you made previously. If you chose Blank Knowledge Pipeline, you’ll see a canvas that contains Knowledge Base node only. There’ll be a note with guide next to the node that walks you through the general steps of pipeline creation.
If you selected a specific pipeline template, there’ll be a ready-to-use workflow that you can use or modify on the canvas right away.
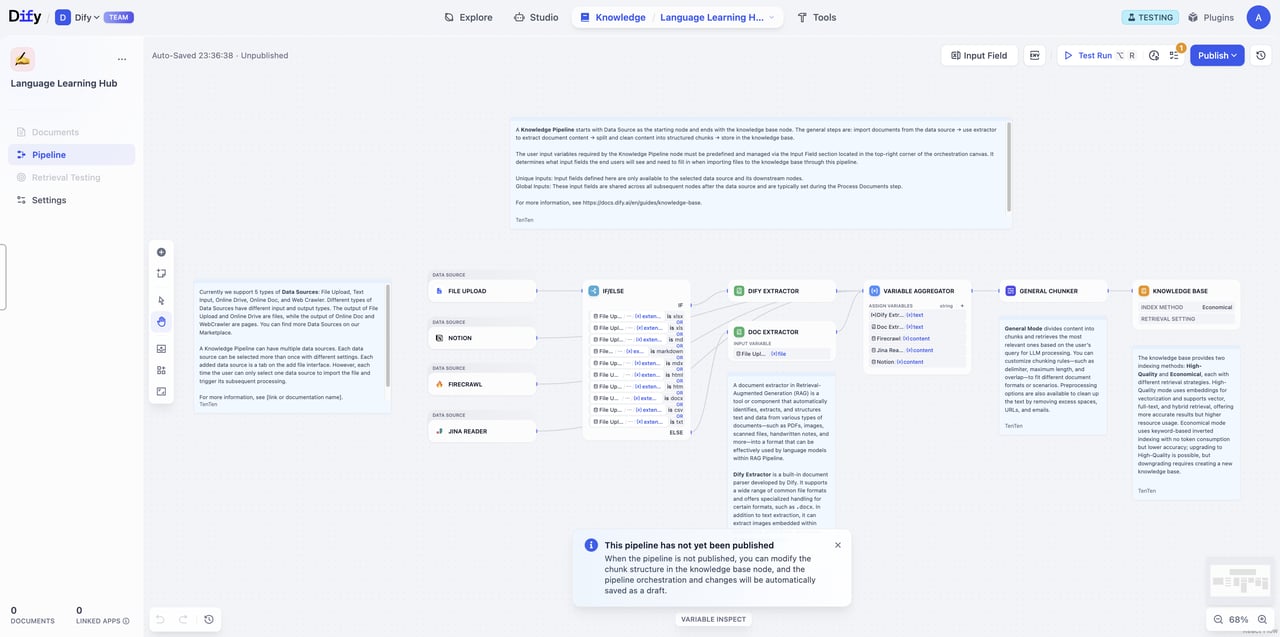
Before we get started, let’s break down the knowledge pipeline process to understand how your documents are transformed into a searchable knowledge base.The knowledge pipeline includes these key steps:
Data Source → Data Processing (Extractor + Chunker) → Knowledge Base Node (Chunk Structure + Retrieval Setting) → User Input Field → Test & Publish
Data Source: Content from various data sources (local files, Notion, web pages, etc.)
Data Processing: Process and transform data content
Extractor: Parse and structure document content
Chunker: Split structured content into manageable segments
Knowledge Base: Set up chunk structure and retrieval settings
User Input Field: Define parameters that pipeline users need to input for data processing
Test & Publish: Validate and officially activate the knowledge base
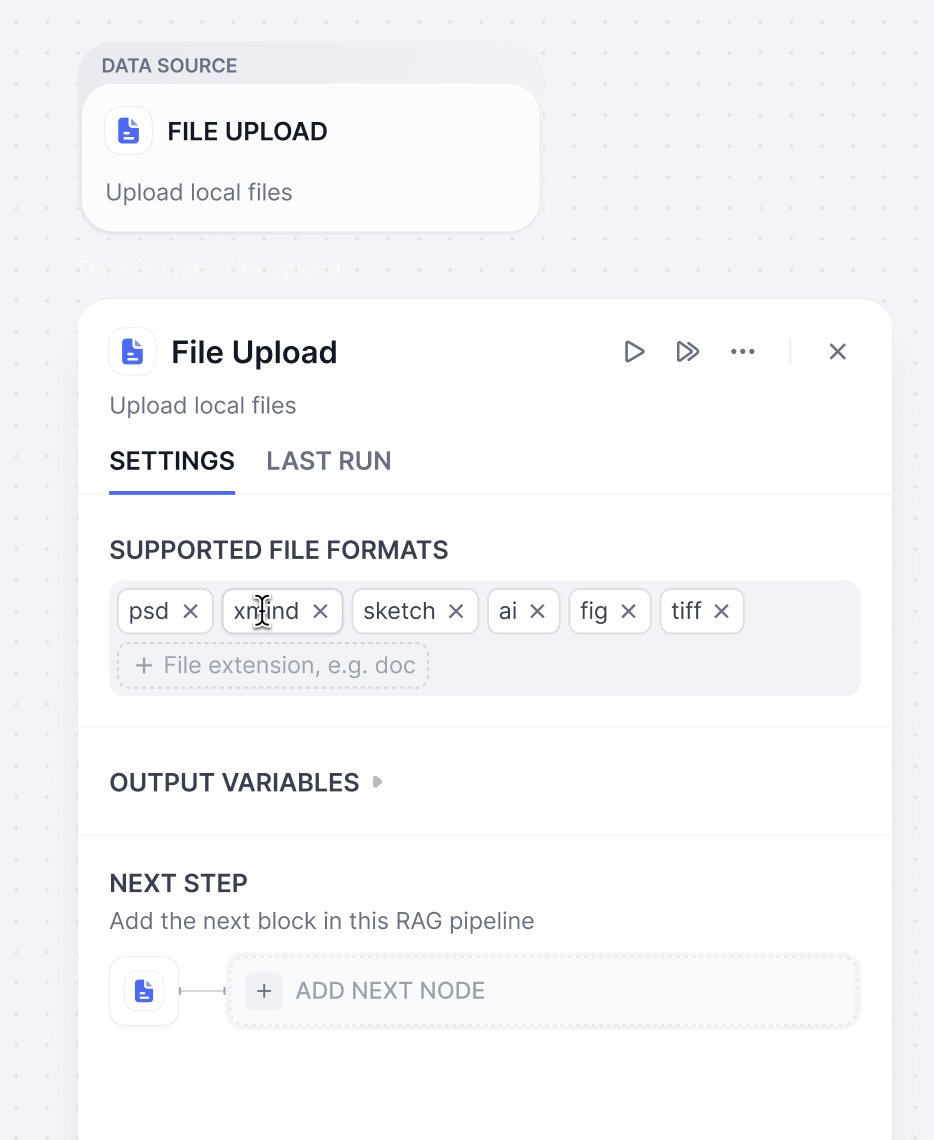
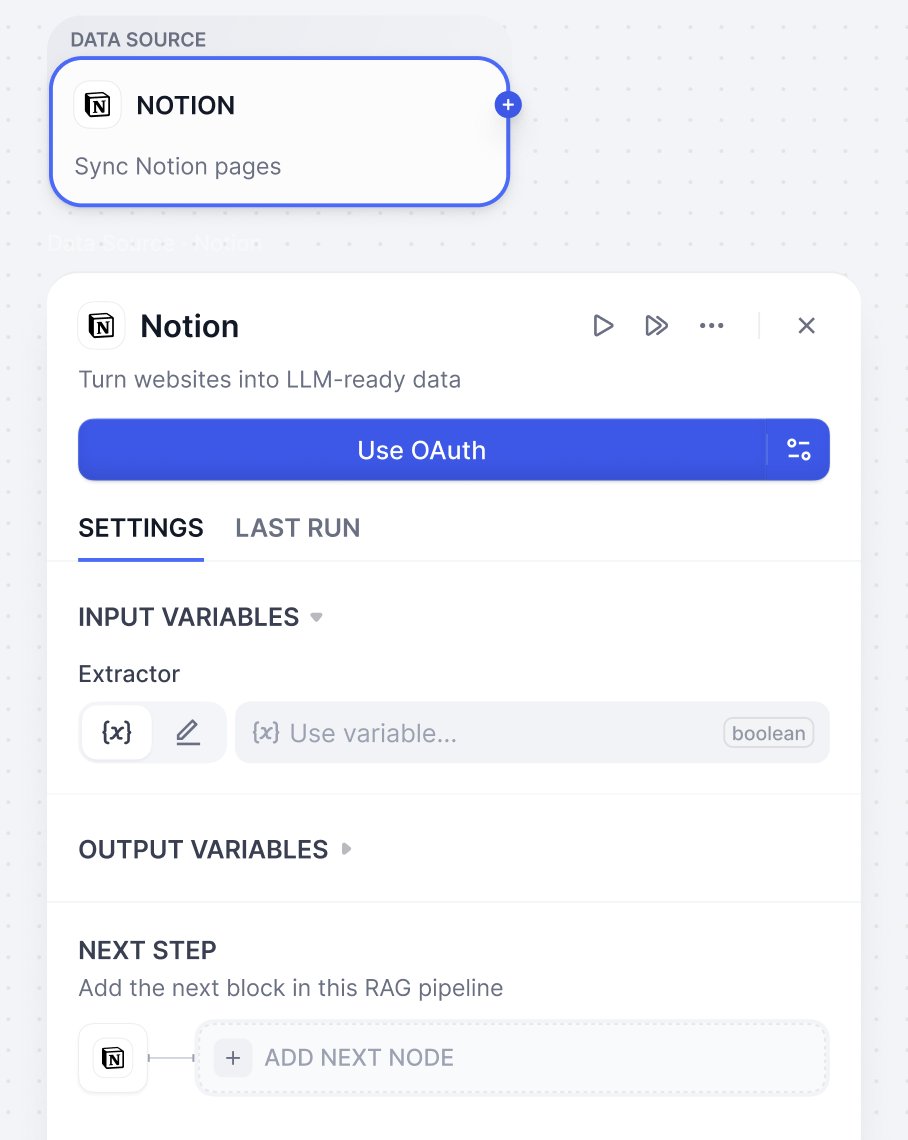
In a knowledge base, you can choose single or multiple data sources. Currently, Dify supports 4 types of data sources: file upload, online drive, online documents, and web crawler.Visit the Dify Marketplace for more data sources.
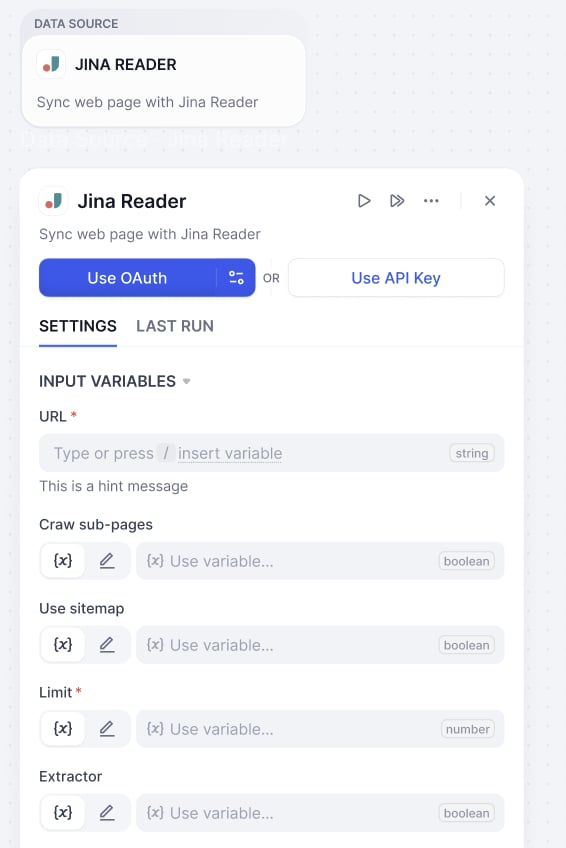
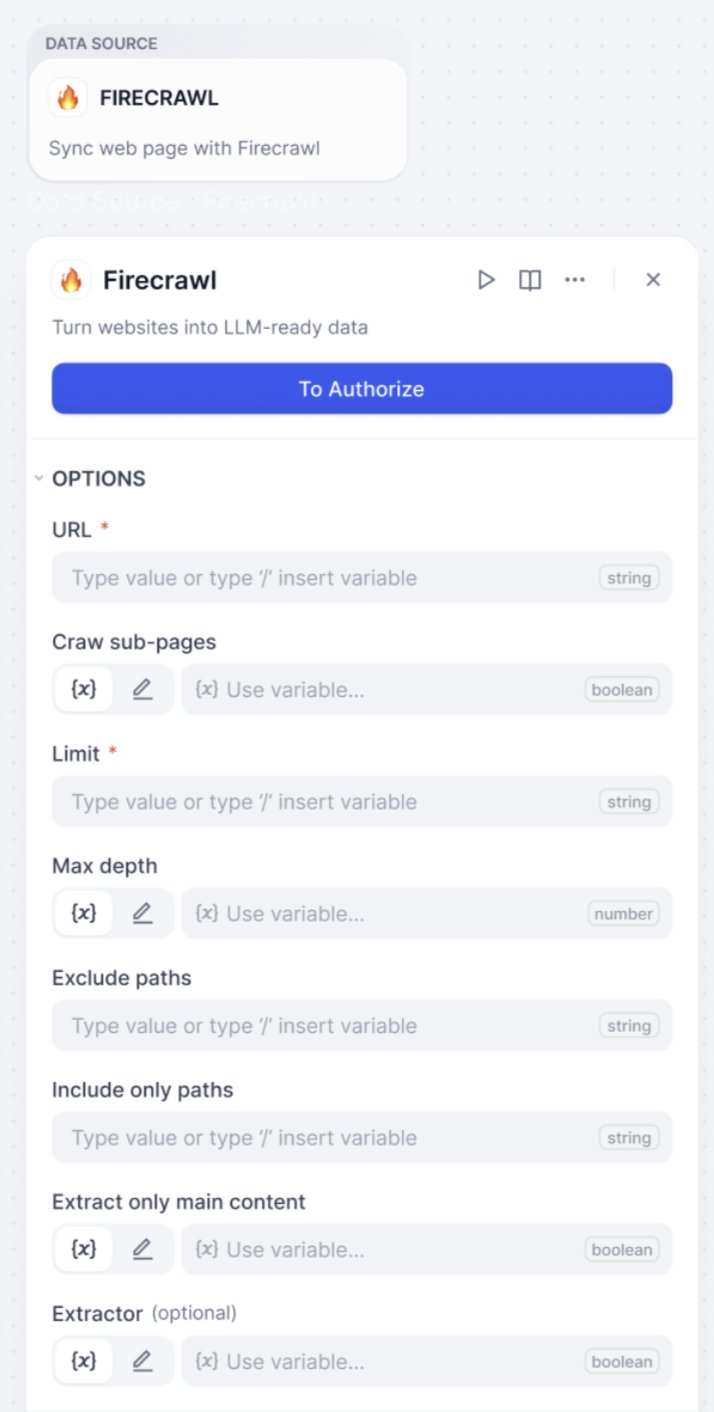
An open-source web parsing tool that provides more refined crawling control options and API services. It supports deep crawling of complex website structures, recommended for batch processing and precise control.
Parameter Configuration
Parameter
Type
Description
URL
Required
Target webpage address
Limit
Required
Set maximum number of pages to crawl
Crawl sub-page
Optional
Whether to crawl linked pages
Max depth
Optional
How many levels deep the crawler will traverse from the starting URL
Exclude paths
Optional
Specify URL patterns that should not be crawled
Include only paths
Optional
Crawl specified paths only
Extractor
Optional
Choose data processing method
Extract Only Main Content
Optional
Isolate and retrieve the primary, meaningful text and media from a webpage
Connect your online cloud storage services (e.g., Google Drive, Dropbox, OneDrive) and let Dify automatically retrieve your files. Simply select and import the documents you need for processing, without manually downloading and re-uploading files.
Need help with authorization? Please check Authorize Data Source for detailed guidance on authorizing different data sources.
In this stage, these tools extract, chunk, and transform the content for optimal knowledge base storage and retrieval. Think of this step like meal preparation. We clean raw materials up, chop them into bite-sized pieces, and organize everything, so the dish can be cooked up quickly when someone orders it.
Documents come in different formats - PDF, XLSX, DOCX. However, LLM can’t read these files directly. That’s where extractors come in. They support multiple formats and handle the conversion, so your content is ready for the next step of the LLMs.You can choose Dify’s Doc Extractor to process files, or select tools based on your needs from Marketplace which offers Dify Extractor and third-party tools such as Unstructured.
For images in documents
Images in documents can be extracted using appropriate document processors. Extracted images are attached to their corresponding chunks, can be managed independently, and are returned alongside those chunks during retrieval.URLs of extracted images remain in the chunk text, but you can safely remove these URLs to keep the text clean—this won’t affect the extracted images.Each chunk supports up to 10 image attachments; images beyond this limit will not be extracted.If no images are extracted by the selected processor, Dify will automatically extract JPG, JPEG, PNG, and GIF images under 2 MB that are referenced via accessible URLs using the following Markdown syntax:


For self-hosted deployments, you can adjust these limits via environment variables:
Maximum image size: ATTACHMENT_IMAGE_FILE_SIZE_LIMIT
Maximum number of attachments per chunk: SINGLE_CHUNK_ATTACHMENT_LIMIT
If you select a multimodal embedding model (marked with a Vision icon) in index settings, the extracted images will also be embedded and indexed for retrieval.
As an information processing center, document extractor node identifies and reads files from input variables, extracts information, and finally converts them into a format that works with the next node.
Dify Extractor is a built-in document parser presented by Dify. It supports multiple common file formats and is specially optimized for Doc files. It can extract and store images from documents and return image URLs.
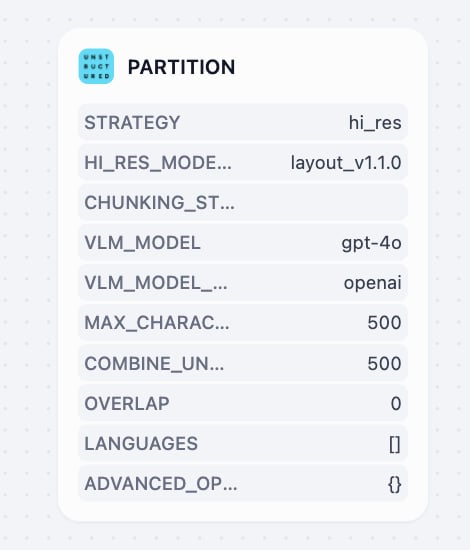
Unstructured transforms documents into structured, machine-readable formats with highly customizable processing strategies. It offers multiple extraction strategies (auto, hi_res, fast, OCR-only) and chunking methods (by_title, by_page, by_similarity) to handle diverse document types, offering detailed element-level metadata including coordinates, confidence scores, and layout information. It’s recommended for enterprise document workflows, processing of mixed file types, and cases that require precise control over document processing parameters.
Similar to human limited attention span, large language models cannot process huge amount of information simultaneously. Therefore, after information extraction, the chunker splits large document content into smaller and manageable segments (called “chunks”).Different documents require different chunking strategies. A product manual works best when split by product features, while research papers should be divided by logical sections. Dify offers 3 types of chunkers for various document types and use cases.
Basic document chunking processing, suitable for documents with relatively simple structures. You can configure text chunking and text preprocessing rules according to the following configuration.Input and Output Variable
Type
Variable
Description
Input Variable
{x} Content
Complete document content that the chunker will split into smaller segments
Output Variable
{x} Array[Chunk]
Array of chunked content, each segment optimized for retrieval and analysis
Chunk Settings
Configuration Item
Description
Delimiter
Default value is \n (line breaks for paragraph segmentation). You can customize chunking rules following regex. The system will automatically execute segmentation when the delimiter appears in text.
Maximum Chunk Length
Specifies the maximum character limit within a segment. When this length is exceeded, forced segmentation will occur.
Chunk Overlap
When segmenting data, there is some overlap between segments. This overlap helps improve information retention and analysis accuracy, enhancing recall effectiveness.
By using a dual-layer segmentation structure to resolve the contradiction between context and accuracy, parent-child clunker achieves the balance between precise matching and comprehensive contextual information in Retrieval Augmented Generation (RAG) systems.How Parent-child Chunker WorksChild Chunks for query matching: Small, precise information segments (usually single sentences) to match user queries with high accuracy.Parent Chunks provide rich context: Larger content blocks (paragraphs, sections, or entire documents) that contain the matching child chunks, giving the large language model (LLM) comprehensive background information.
Type
Variable
Description
Input Variable
{x} Content
Complete document content that the chunker will split into smaller segments
Output Variable
{x} Array[ParentChunk]
Array of parent chunks
Chunk Settings
Configuration Item
Description
Parent Delimiter
Set delimiter for parent chunk splitting
Parent Maximum Chunk Length
Set maximum character count for parent chunks
Child Delimiter
Set delimiter for child chunk splitting
Child Maximum Chunk Length
Set maximum character count for child chunks
Parent Mode
Choose between Paragraph (split text into paragraphs) or “Full Document” (use entire document as parent chunk) for direct retrieval
Combining extraction and chunking in one node, Q&A Processor is specifically designed for structured Q&A datasets from CSV and Excel files. Perfect for FAQ lists, shift schedules, and any spreadsheet data with clear question-answer pairs.Input and Output Variable
Now that your documents are processed and chunked, it’s time to set up how they’ll be stored and retrieved. Here, you can select different indexing methods and retrieval strategies based on your specific needs.Knowledge base node configuration includes: Input Variable, Chunk Structure, Index Method, and Retrieval Settings.
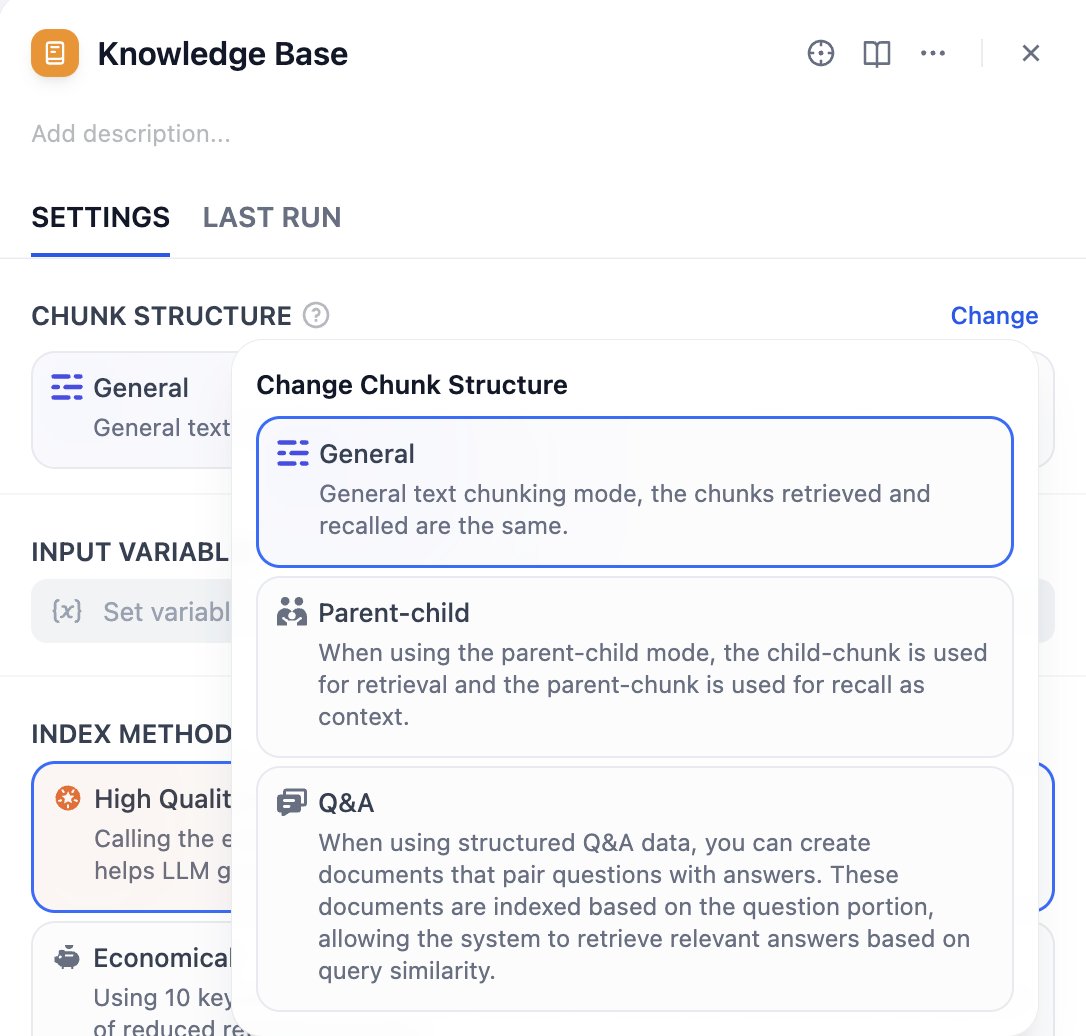
Chunk structure determines how the knowledge base organizes and indexes your document content. Choose the structure mode that best fits your document type, use case, and cost.The knowledge base supports three chunk modes: General Mode, Parent-child Mode, and Q&A Mode. If you’re creating a knowledge base for the first time, we recommend choosing Parent-child Mode.
Important Reminder: Chunk structure cannot be modified once saved and published. Please choose carefully.
Suitable for most standard document processing scenarios. It provides flexible indexing options—you can choose appropriate indexing methods based on different quality and cost requirements.General mode supports both high-quality and economical indexing methods, as well as various retrieval settings.
It provides precise matching and corresponding contextual information during retrieval, suitable for professional documents that need to maintain complete context.Parent-child mode supports HQ (High Quality) mode only, offering child chunks for query matching and parent chunks for contextual information during retrieval.
Create documents that pair questions with answers when using structured question-answer data. These documents are indexed based on the question portion, enabling the system to retrieve relevant answers based on query similarity.Q&A Mode supports HQ (High Quality) mode only.
Input variables receive processing results from data processing nodes as the data source for knowledge base. You need to connect the output from chunker to the knowledge base as input.The node supports different types of standard inputs based on the selected chunk structure:
General Mode: x Array[Chunk] - General chunk array
Parent-child Mode: x Array[ParentChunk] - Parent chunk array
The index method determines how your knowledge base builds content indexes, while retrieval settings provide corresponding retrieval strategies based on the selected index method.Think of it in this way: the index method determines how to organize your documents, while retrieval settings tell users what methods they can use to find documents.The knowledge base provides two index methods: High Quality and Economical, each offering different retrieval setting options.The High Quality method uses embedding models to convert chunks into numerical vectors, helping to compress and store large amounts of information more effectively. This enables the system to find semantically relevant accurate answers even when the user’s question wording doesn’t exactly match the document.
To enable cross-modal retrieval—retrieving both text and images based on semantic relevance—select a multimodal embedding model (marked with a Vision icon). Images extracted from documents will then be embedded and indexed for retrieval.Knowledge bases using such embedding models are labeled Multimodal on their cards.
In the Economical method, each block uses 10 keywords for retrieval without calling embedding models, generating no costs.
Common search engine retrieval method, matches queries with key content
If the selected embedding model is multimodal, select a multimodal rerank model (marked with a Vision icon) as well. Otherwise, retrieved images will be excluded from reranking and the retrieval results.
You can also refer to the table below for information on configuring chunk structure, index methods, parameters, and retrieval settings.
Chunk Structure
Index Methods
Parameters
Retrieval Settings
General mode
High Quality
Economical
Embedding Model
Number of Keywords
Vector Retrieval Full-text Retrieval Hybrid Retrieval Inverted Index
Automatically generate summaries for all chunks to enhance their retrievability.Summaries are embedded and indexed for retrieval as well. When a summary matches a query, its corresponding chunk is also returned.You can manually edit auto-generated summaries or regenerate them for specific documents later. See Manage Knowledge Content for details.
If you select a vision-capable LLM, summaries will be generated based on both the chunk text and any attached images.
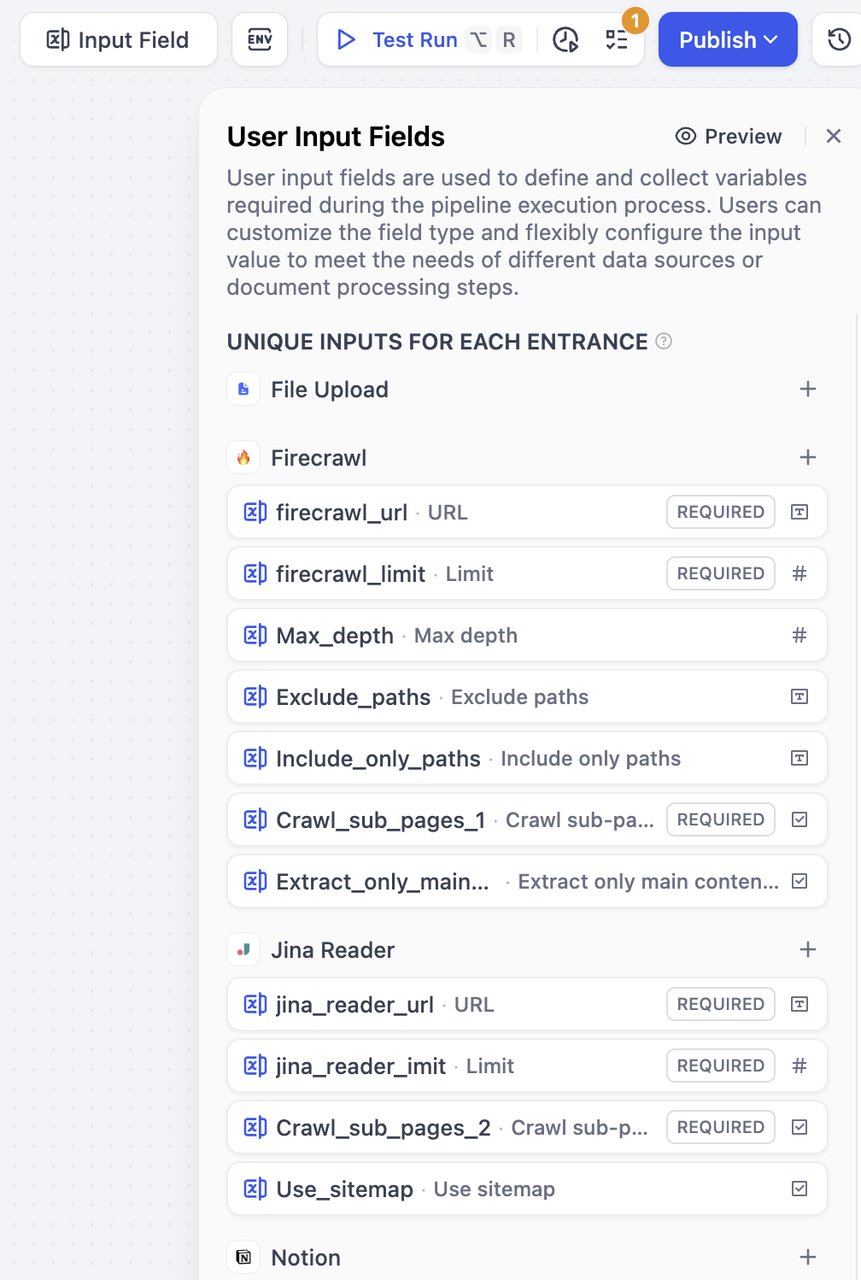
User input forms are essential for collecting the initial information your pipeline needs to run effectively. Similar to the User Input node in workflow, this form gathers necessary details from users - such as files to upload, specific parameters for document processing - ensuring your pipeline has all the information it needs to deliver accurate results.This way, you can create specialized input forms for different use scenarios, improving pipeline flexibility and usability for various data sources or document processing steps.
Pipeline Orchestration Interface
Click on the Input field to start creating and configuring input forms.\
Node Parameter Panel
Select a node. Then, in parameter input on the right-side panel, click + Create user input for new input items. New input items will also be collected in the Input Field. 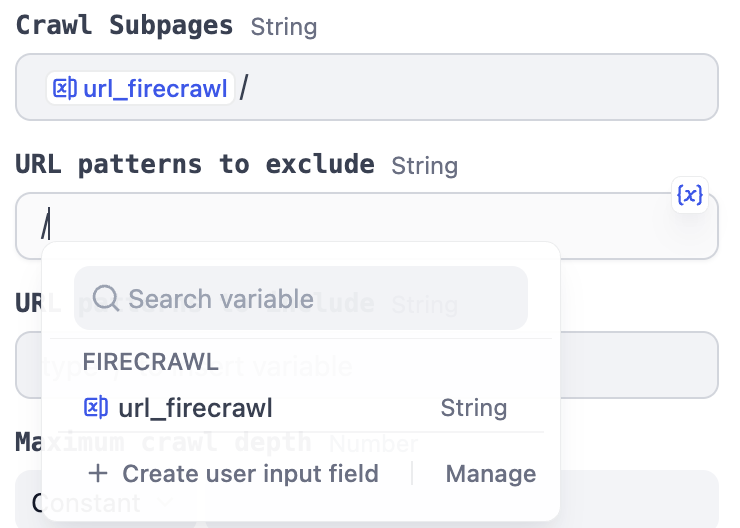
These inputs are specific to each data source and its downstream nodes. Users only need to fill out these fields when selecting the corresponding data source, such as different URLs for different data sources.How to create: Click the + button on the right side of a data source to add fields for that specific data source. These fields can only be referenced by that data source and its subsequently connected nodes.
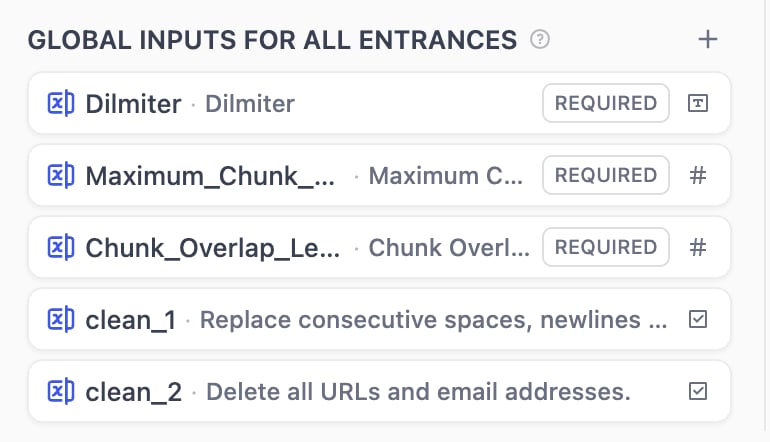
Global shared inputs can be referenced by all nodes. These inputs are suitable for universal processing parameters, such as delimiters, maximum chunk length, document processing configurations, etc. Users need to fill out these fields regardless of which data source they choose.How to create: Click the + button on the right side of Global Inputs to add fields that can be referenced by any node.
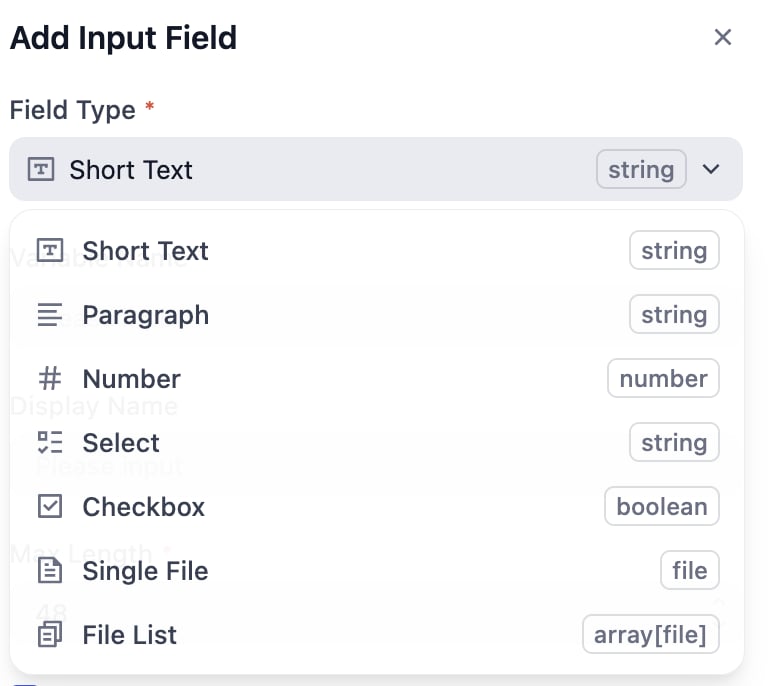
All input field types include: required, optional, and additional settings. You can set whether fields are required by checking the appropriate option.
Setting
Name
Description
Example
Required Settings
Variable Name
Internal system identifier, usually named using English and underscores
user_email
Display Name
Interface display name, usually concise and readable text
User Email
Type-specific Settings
Special requirements for different field types
Text field max length 100 characters
Additional Settings
Default Value
Default value when user hasn’t provided input
Number field defaults to 0, text field defaults to empty
Placeholder
Hint text displayed when input box is empty
”Please enter your email”
Tooltip
Explanatory text to guide user input, usually displayed on mouse hover
”Please enter a valid email address”
Special Optional Settings
Additional setting options based on different field types
Validation of email format
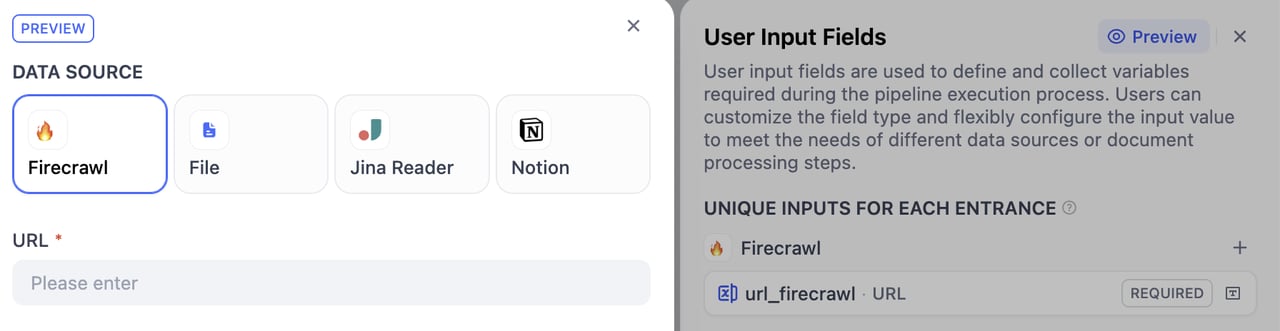
After completing configuration, click the preview button in the upper right corner to browse the form preview interface. You can drag and adjust field groupings. If an exclamation mark appears, it indicates that the reference is invalid after moving.
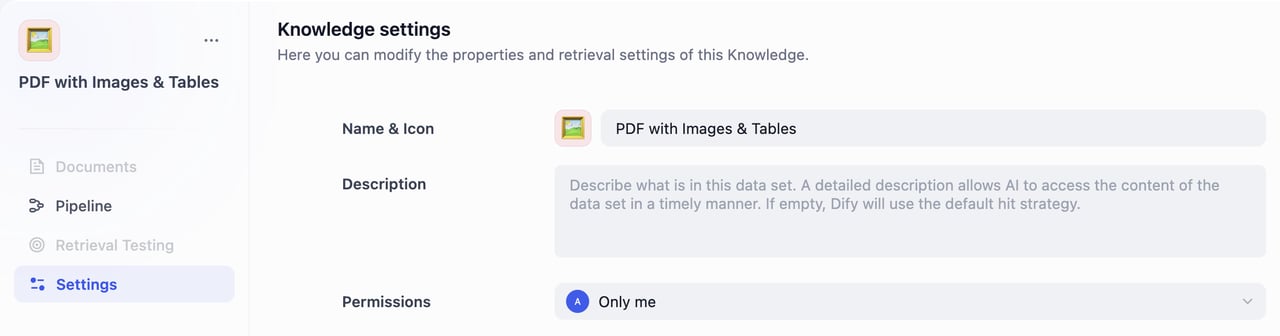
By default, the knowledge base name will be “Untitled + number”, permissions are set to “Only me”, and the icon will be an orange book. If you import it from a DSL file, it will use the saved icon.Edit knowledge base information by clicking Settings in the left panel and fill in the information below:
Name & Icon
Pick a name for your knowledge base.
Choose an emoji, upload an image, or paste an image URL as the icon of this knowledge base.
Knowledge Description
Provide a brief description of your knowledge base. This helps the AI better understand and retrieve your data. If left empty, Dify will apply the default retrieval strategy.
Permissions
Select the appropriate access permissions from the dropdown menu.
You’re almost there! This is the final step of the knowledge pipeline orchestration.After completing the orchestration, you need to validate all the configuration first. Then, do some running tests and confirm all the settings. Finally, publish the knowledge pipeline.
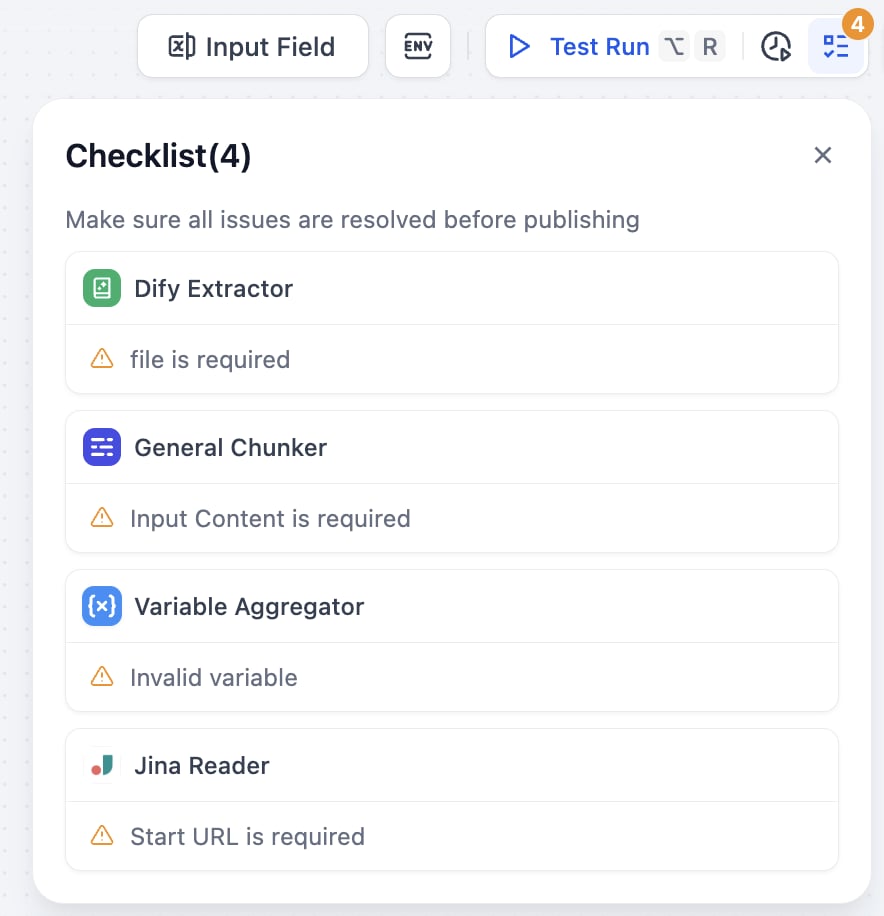
Before testing, it’s recommended to check the completeness of your configuration to avoid test failures due to missing configurations.Click the checklist button in the upper right corner, and the system will display any missing parts.
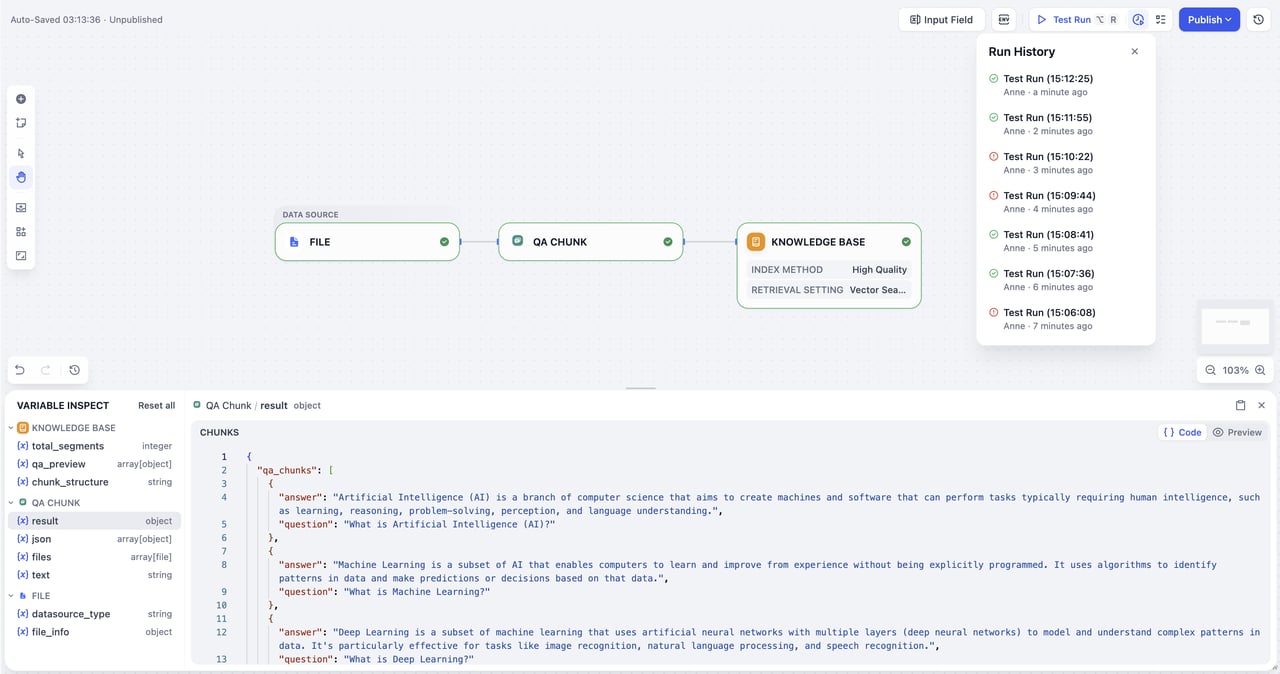
After completing all configurations, you can preview the knowledge base pipeline’s operation through test runs, confirm that all settings are accurate, and then proceed with publishing.
Start Test: Click the “Test Run” button in the upper right corner
Import Test File: Import files in the data source window that pops up on the right
Important Note: For better debugging and observation, only one file upload is allowed per test run.
Fill Parameters: After successful import, fill in corresponding parameters according to the user input form you configured earlier
Start Test Run: Click next step to start testing the entire pipeline
During testing, you can access History Logs (track all run records with timestamps, execution status, and input/output summaries) and Variable Inspector (a dashboard at the bottom showing input/output data for each node to help identify issues and verify data flow) for efficient troubleshooting and error fixing.